 Skip to content
 Introducing:
Our Natural Stone Designer Tool
Finally— an easy way to create real Natural Stone CAD Material Textures for your renderings
Until now, creating realistic material textures of natural stone for CAD renderings has been a challenge. Doing so for the actual stone you want to use for a project is an even bigger challenge. You might start with a nice looking image from a Google search or from a supplier catalog, only to discover that it looks terrible when used for rendering your design. Or you might start with a downloadable CAD file available from any number of material texture libraries, only to discover that it does not represent stone that you can actually obtain.
Our new Stone Designer web app solves these challenges. The inspiration for Stone Designer came from talking with architects who told us they need not just realistic, but real stone material textures to use in their CAD renderings.
Unlike any other stone rendering tool, Stone Designer creates CAD material textures of actual stone; stone that can be ordered and shipped to your job site. The stone is real. The colors are real. The surfaces are real.
With Stone Designer you can easily visualize stone materials in different design patterns. Experiment with stone color, surface finish, shape, size, joints, and mortar. Blend a variety of stone materials to create something unique. When you’re done experimenting, download the finished CAD material texture file for use in your renderings and presentations. And most importantly—rest assured you will be able to get the stone being displayed.
Before diving into trying out the Stone Designer, let’s look at challenges that needed to be solved.
CHALLENGES OUR STONE DESIGNER TOOL SOLVES
Availability – While stone renderings always show stone, they often do not show stone that can be obtained readily. We start with images of stone materials that we know we can deliver. Lead times may vary, but you can count on availability.
Resolution – Not all stone images have sufficient pixel resolution to use for CAD material textures. As a rule of thumb, we find that 72-96 pixels per inch of stone surface works well. Anything less and the material texture can appear pixelated. We solve this by starting with high resolution images.
Size/Scale – The size of the stone represented in the image needs to be large enough to cover (paint) the largest piece of stone in the design pattern. This is a challenge because most good quality photos of natural stone cover relatively small areas—usually less than 12” x 12”. When these images are used for painting a larger piece of stone, very noticeable tiling can occur. We solve this by using either a large format photo, or a proprietary image processing technique we call compositing.
Color Variation – No two pieces of natural stone look exactly the same. Color variations can be subtle or dramatic, especially when color patterns show a high level of movement. Think of this as capturing the variation you might expect in a stone shipment. We solve this by taking multiple images to illustrate the expected color and color pattern variations.
Surface Finish – With today’s high-tech fabrication, the same stone may be available in various surface finishes. Even with the same color, these can be very different from one another in appearance. Using an image of the incorrect surface finish can yield unrealistic renderings. We solve this by using the correct photos to illustrate the actual surface finish.
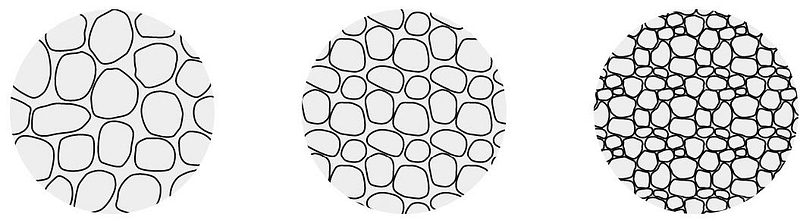
Tiling – The nature of applying small area CAD material textures on a larger drawing surface requires that the material texture is repeated. The question is “can it be repeated without noticeable tiling effects?”. In part, we solve this by addressing the size and scale challenges described above but we have also developed over 80 seamless design patterns for a wide range of applications (e.g……. veneer, cobblestones, dimensional pavers, irregular pavers, etc).
Rendering Maps – More advanced rendering software, whether included in your CAD system or an add-on to your CAD system, employ various maps to more realistically render objects. These can include bump maps, normal maps, displacement maps, reflectivity maps and/or hatches. The challenge is creating these files to match your material textures. We solve this challenge by automatically creating some of these files for you.
TRY OUR STONE DESIGNER
The concept behind Stone Designer is simple—to provide you with a free tool to visualize various stone materials in different design patterns. We allow you to quickly experiment with color, surface finish, shape, size, joints, and mortar—or blend a variety of stone materials to create something unique. When you’re done experimenting, download the finished material texture for use in your CAD renderings and presentations to clients.
While shipping actual stone samples for physical mockups may still be needed, using Stone Designer will help you focus on obtaining the right samples more quickly. Our goal is to save you time, and help you achieve faster client acceptance.
Here’s how it works:
- Select a Design Pattern
- Select a Stone Material
- Adjust Size/Scale
- Adjust Joints
- Experiment
- Download CAD Resources
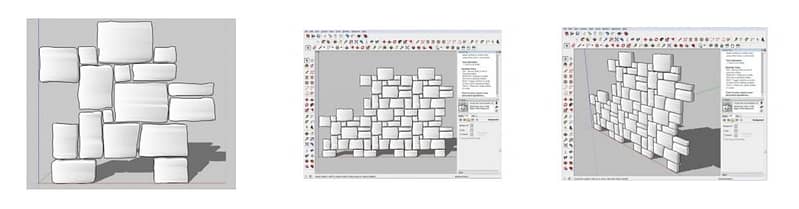
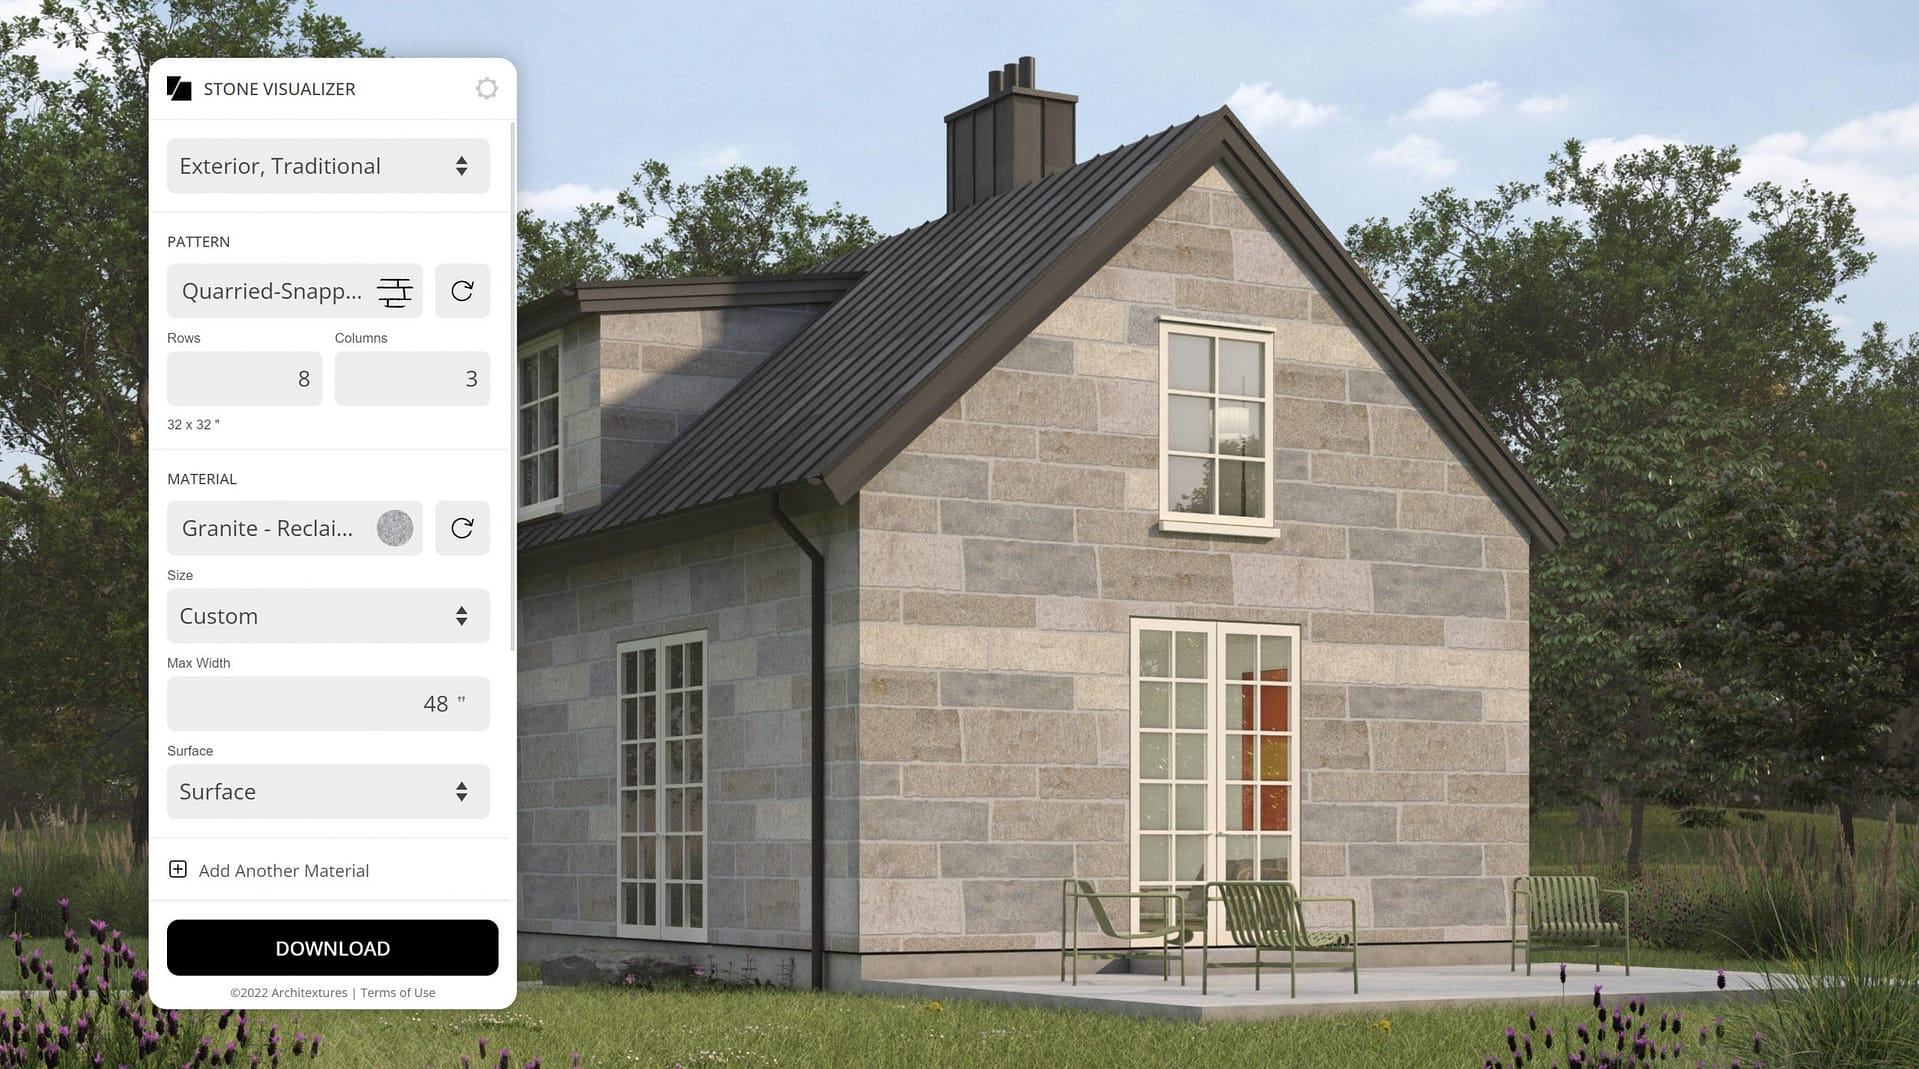
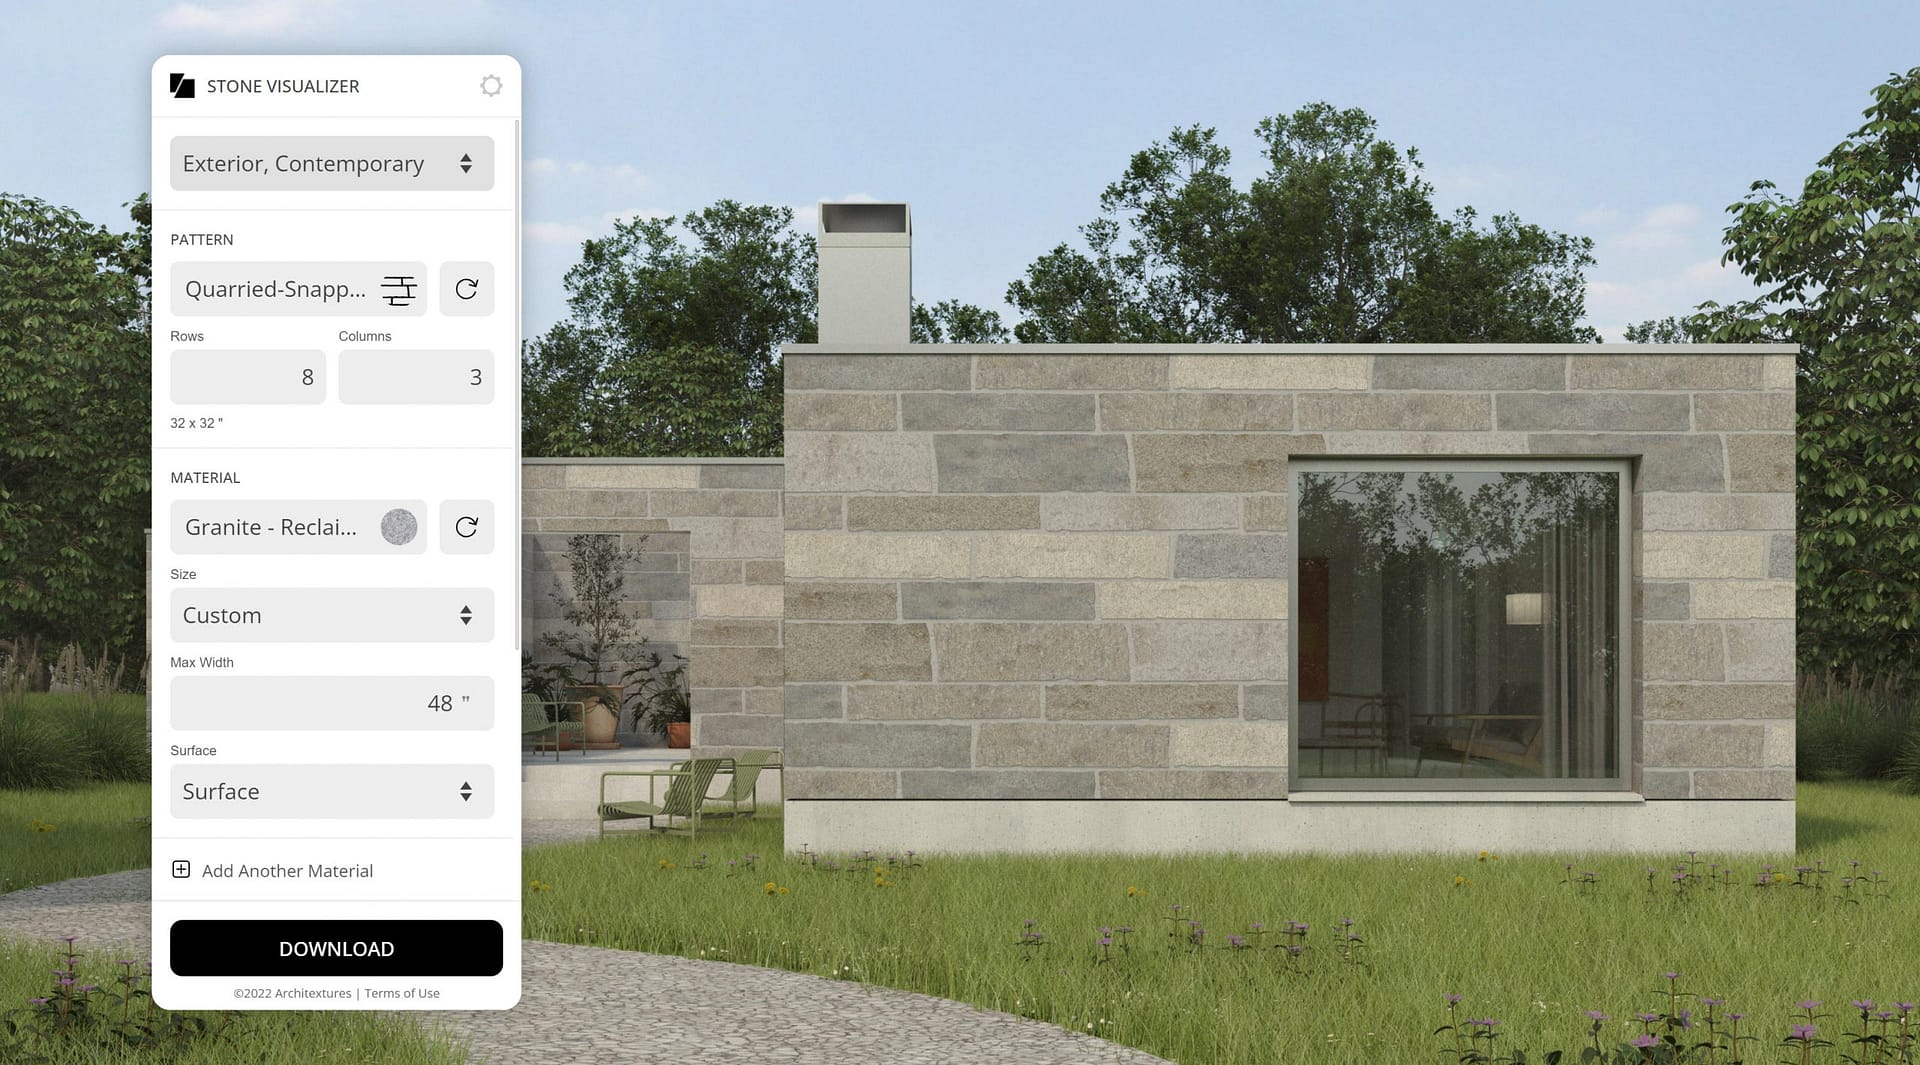
1. Select a Design Pattern

Start by selecting from over 80 seamless ready to use design patterns for paver, veneer, and wallstone applications. In the example above, we will select the Dimensional French Adjustable Widths and Heights pattern.
Design patterns are organized by the following categories:
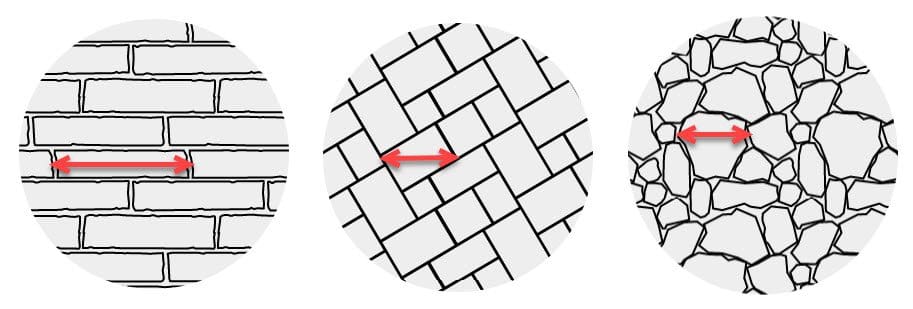
Cobblestone – Patterns applicable to cobblestones. These are organized by the shape of the cobblestone (rectangular vs. cube), the side facing upwards if rectangular (narrow side vs. wide side), and the arrangement and orientation of the cobblestone pieces (grid, random, running bond, herringbone, fan).

Dimensional – Patterns applicable to rectangular stone shapes (squares, rectangles, planks). Dimensional patterns can be made up of stone sawn to specific sizes or random sizes. Dimensional patterns are generally for sawn stone shapes. Because of the relatively straight edges, joints can be very tight. These patterns can be used in either paver or veneer applications, although they will differ in scale.
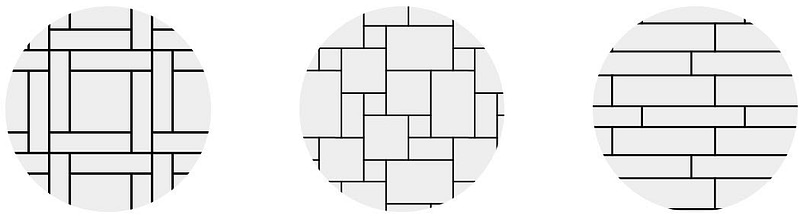
Fieldstone – Patterns applicable to natural stone shapes. Fieldstone patterns are irregular in shape and have natural edges. Fieldstone patterns are used in wallstone applications.
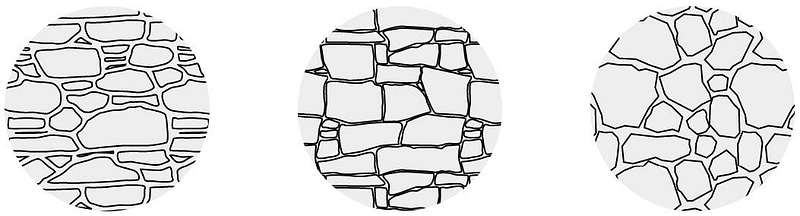
Flagging – Patterns applicable to irregular stone shapes used in path and patio paver applications. Flagging patterns can be applied to fieldstone as well as quarried stone (generally split into irregular shapes).
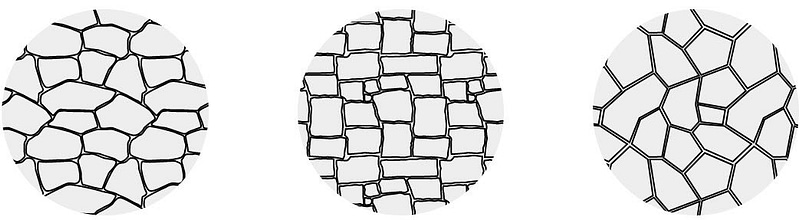
Quarried-Snapped – Patterns applicable to stone shapes produced by snapping or splitting. These come in a variety of shapes, but all have irregular edges. Quarried-Snapped patterns are used in paver and veneer applications where they differ in scale.
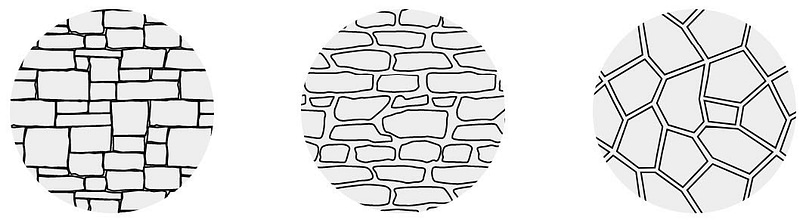
Rounds – Patterns applicable to roundish stone shapes used in paver and veneer applications. We provide large, medium and small scale rounds patterns to account for the differing size mixes.
Note that all our design patterns are also available separately as seamless 2D and 3D CAD files (SKP, DWG, DXF). Visit our 3D CAD Design Patterns page to view and download them for free.
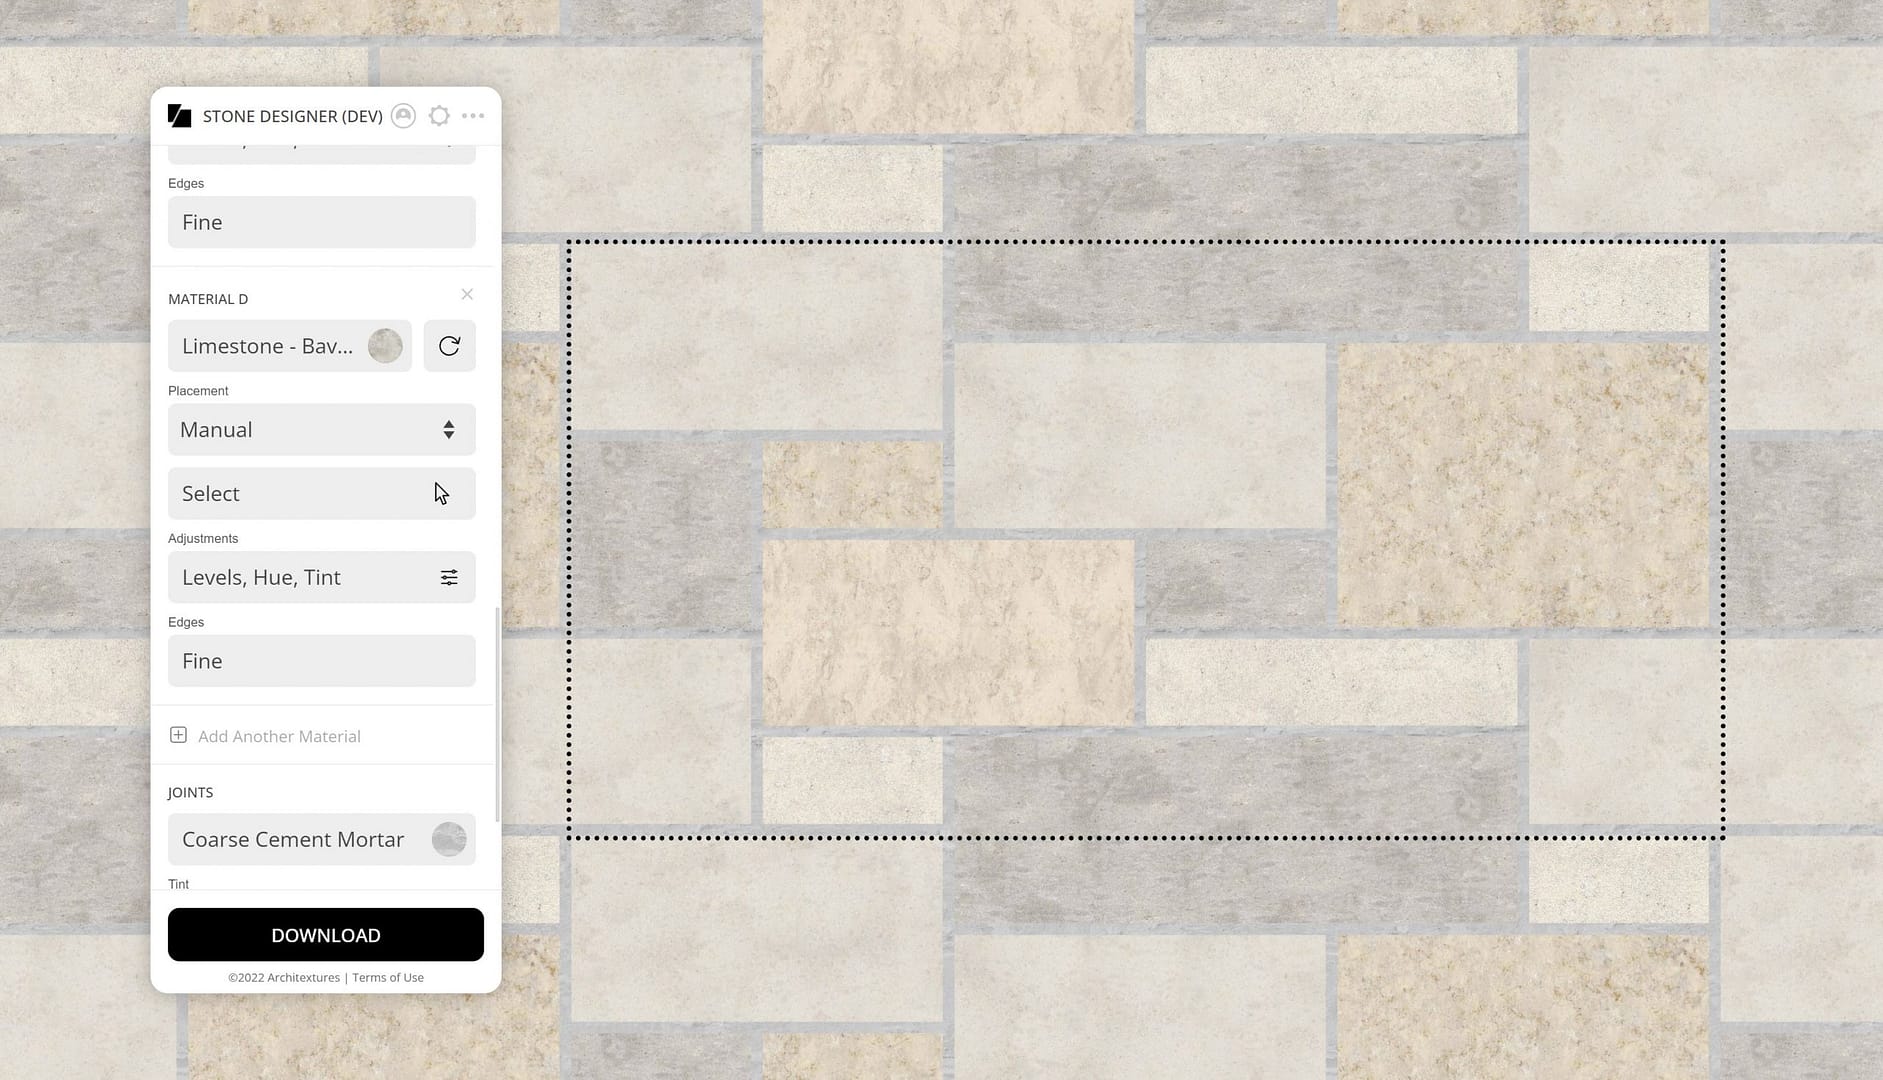
2. Select a Stone Material

The Material section allows you to select a specific stone material to paint the design pattern with. The selection list is organized by stone species, including limestone, bluestone, granite, basalt, etc. We have also broken out cobblestones and thin veneer to make these specialty materials easy to find. Freeze/thaw compatible limestone is also broken out.
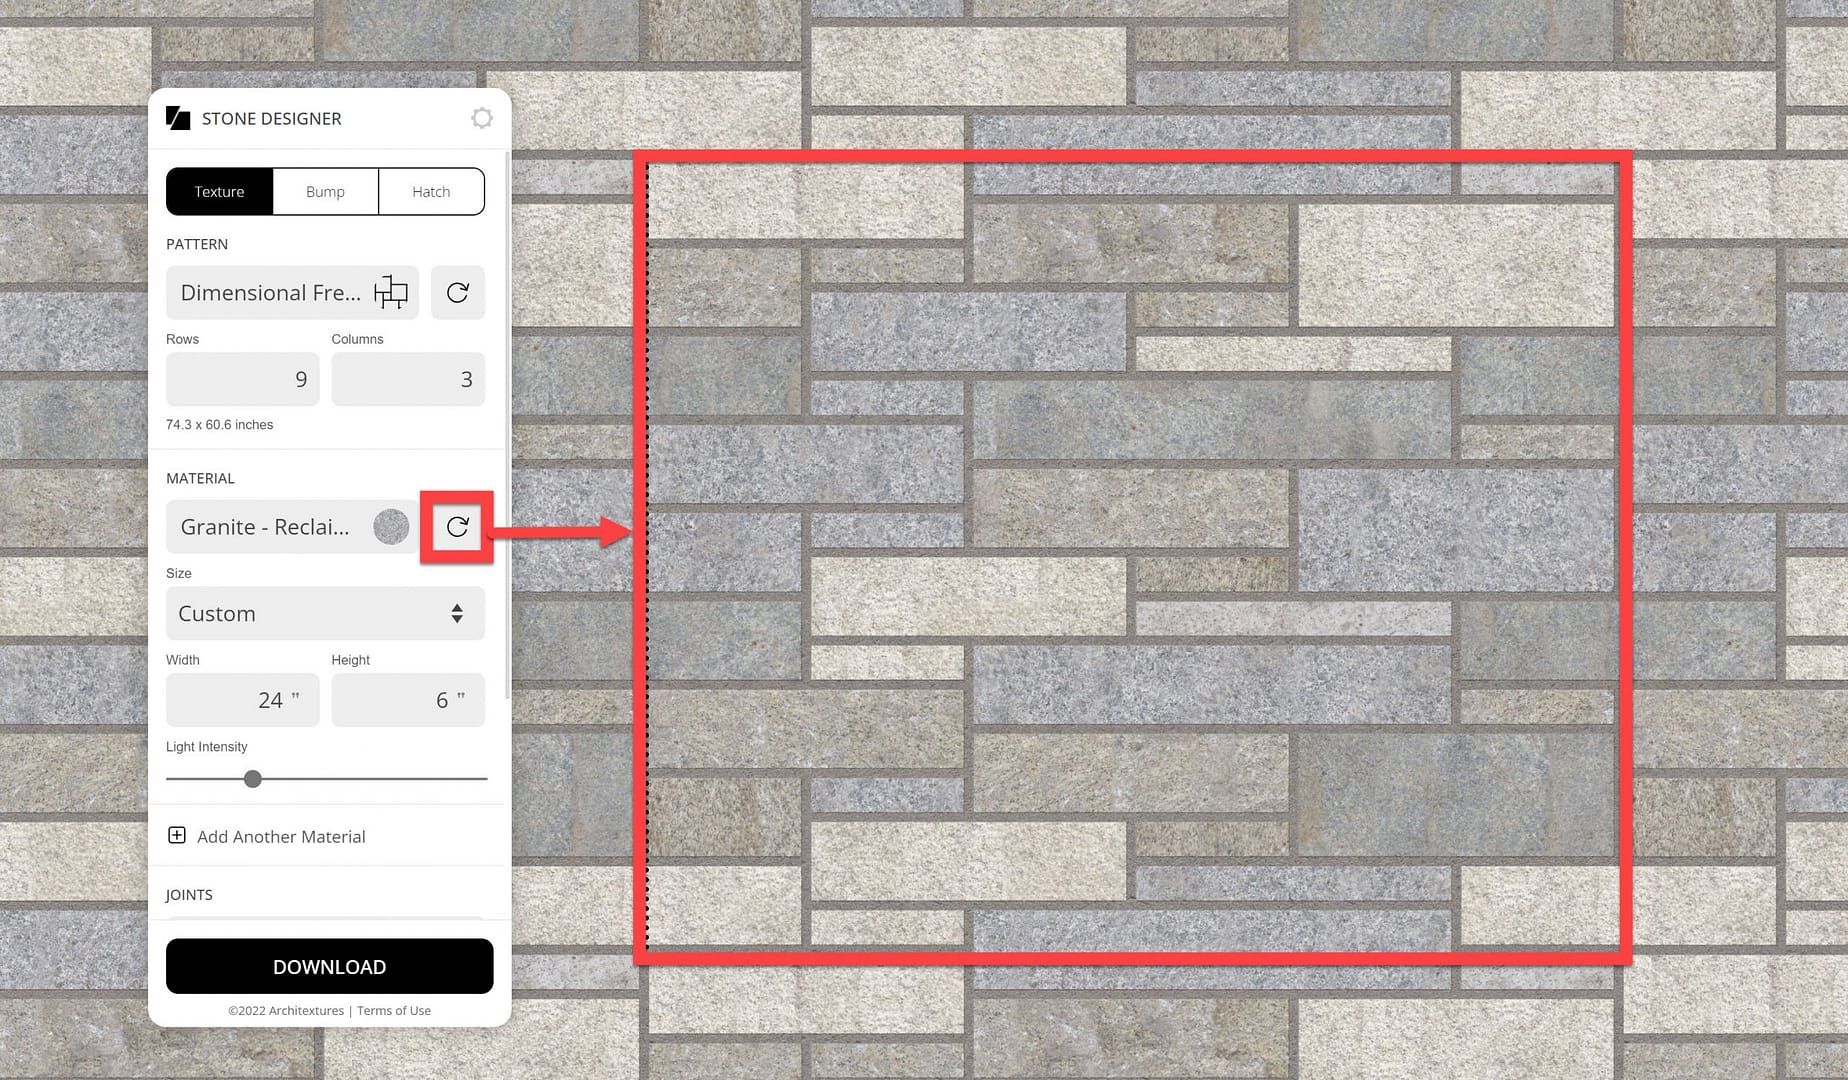
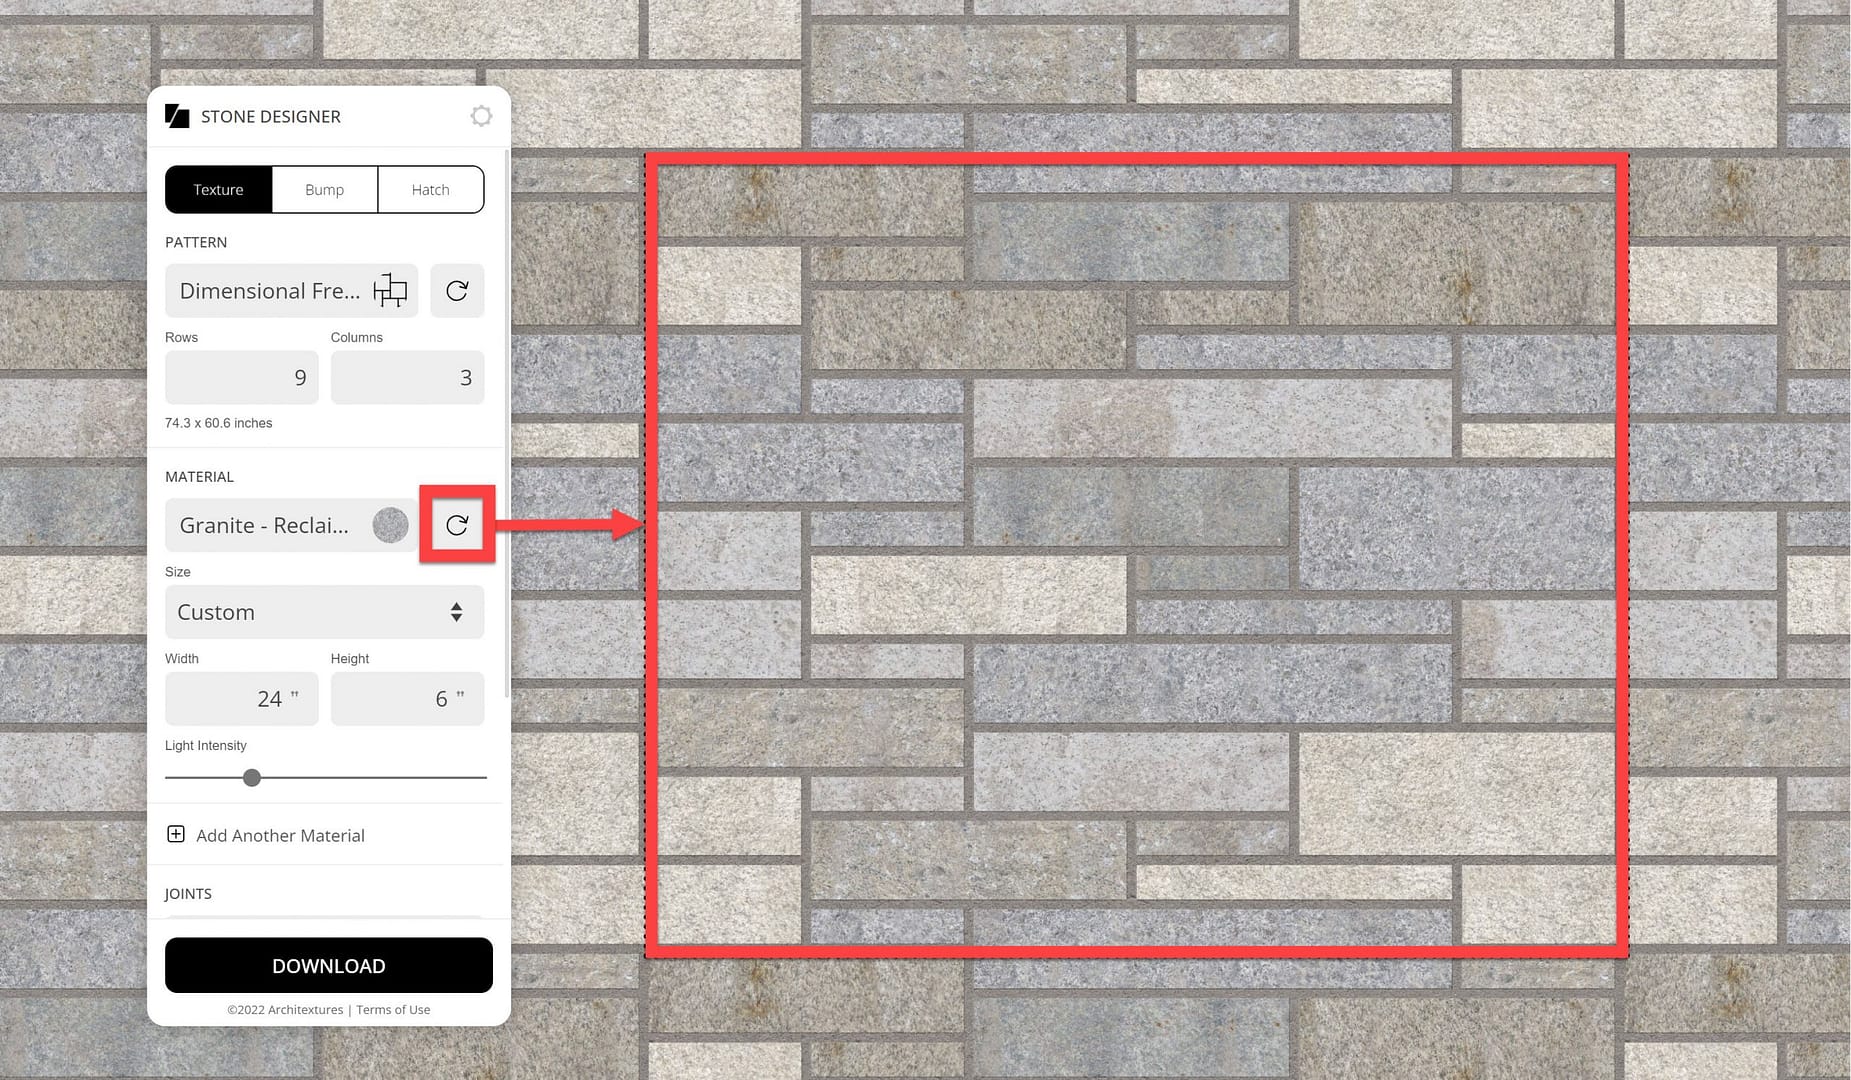
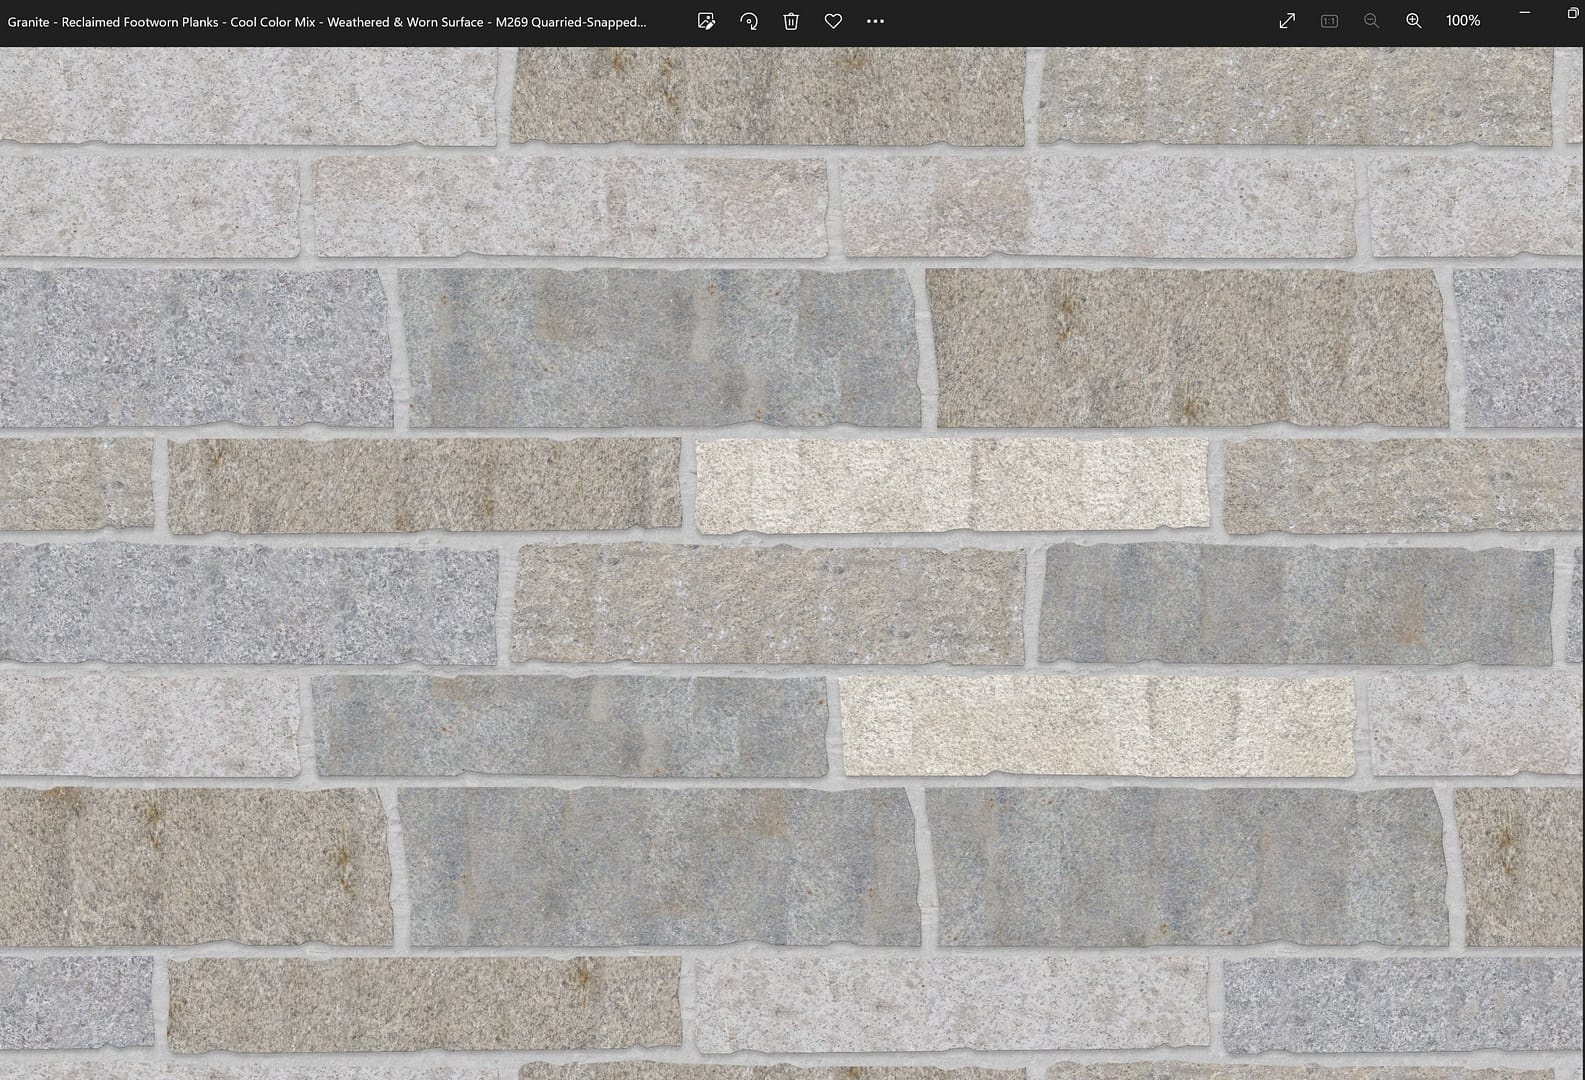
Where the actual stone can be sorted into specific color themes for delivery, we have replicated these color themes in Stone Designer. For example, our imported granite footworn plank paver materials are available in 3 color themes: warm colors, cool colors, and full color. So we provide three different Stone Designer Materials representing these color themes. In the example above, we will select Granite – Reclaimed Footworn Planks – Cool Color Mix – Weathered & Worn Surface.
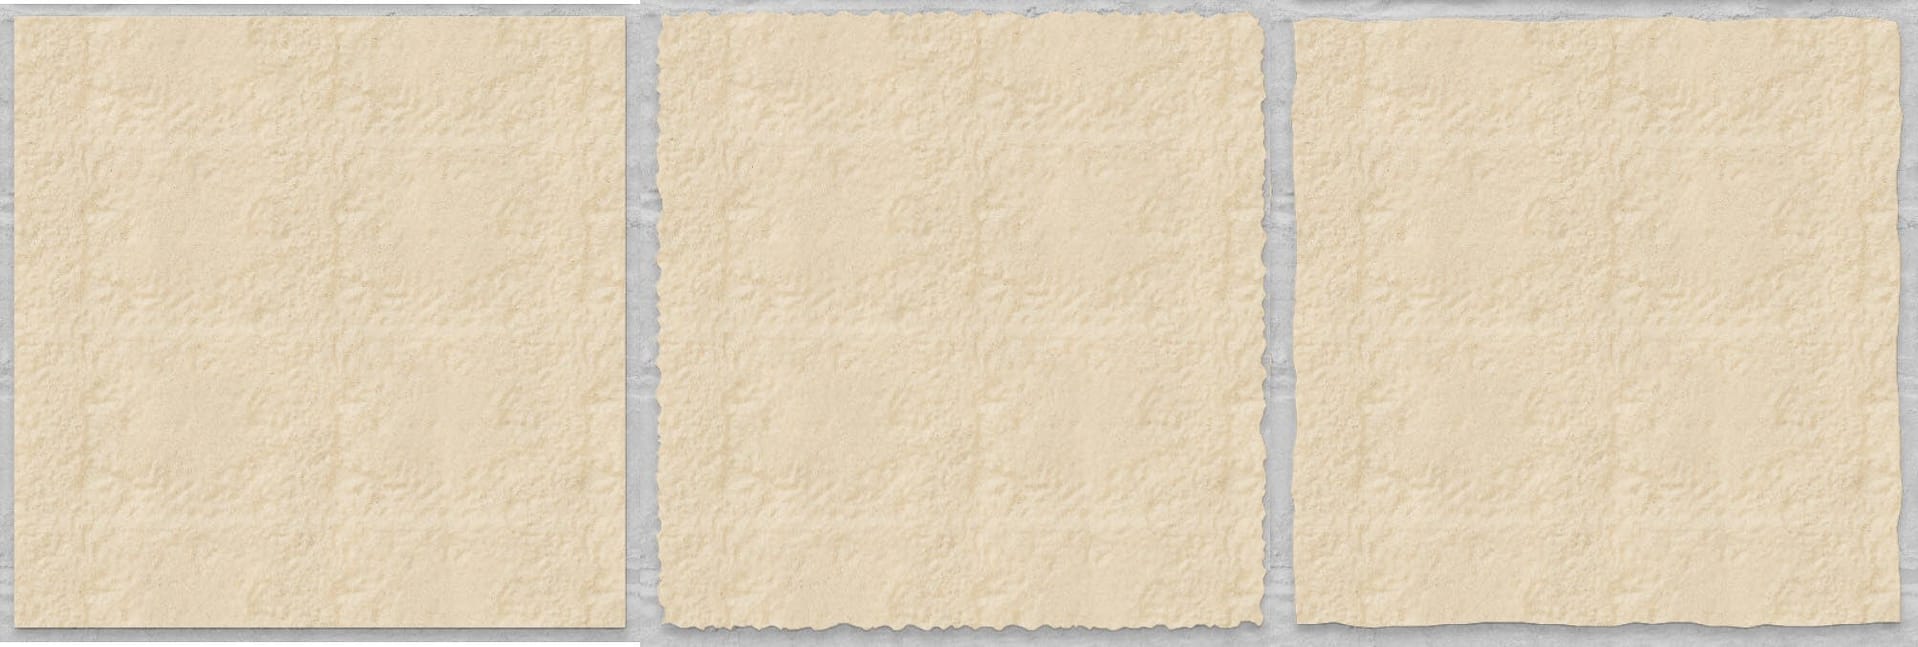
For certain Stone Designer Materials, we will use multiple images to illustrate the natural variation in the stone that you would expect in a shipment. For example, the material Granite – Reclaimed Footworn Planks – Cool Color Mix – Weathered & Worn Surface is represented by the stone images below. Each represents a 72×72” stone surface.

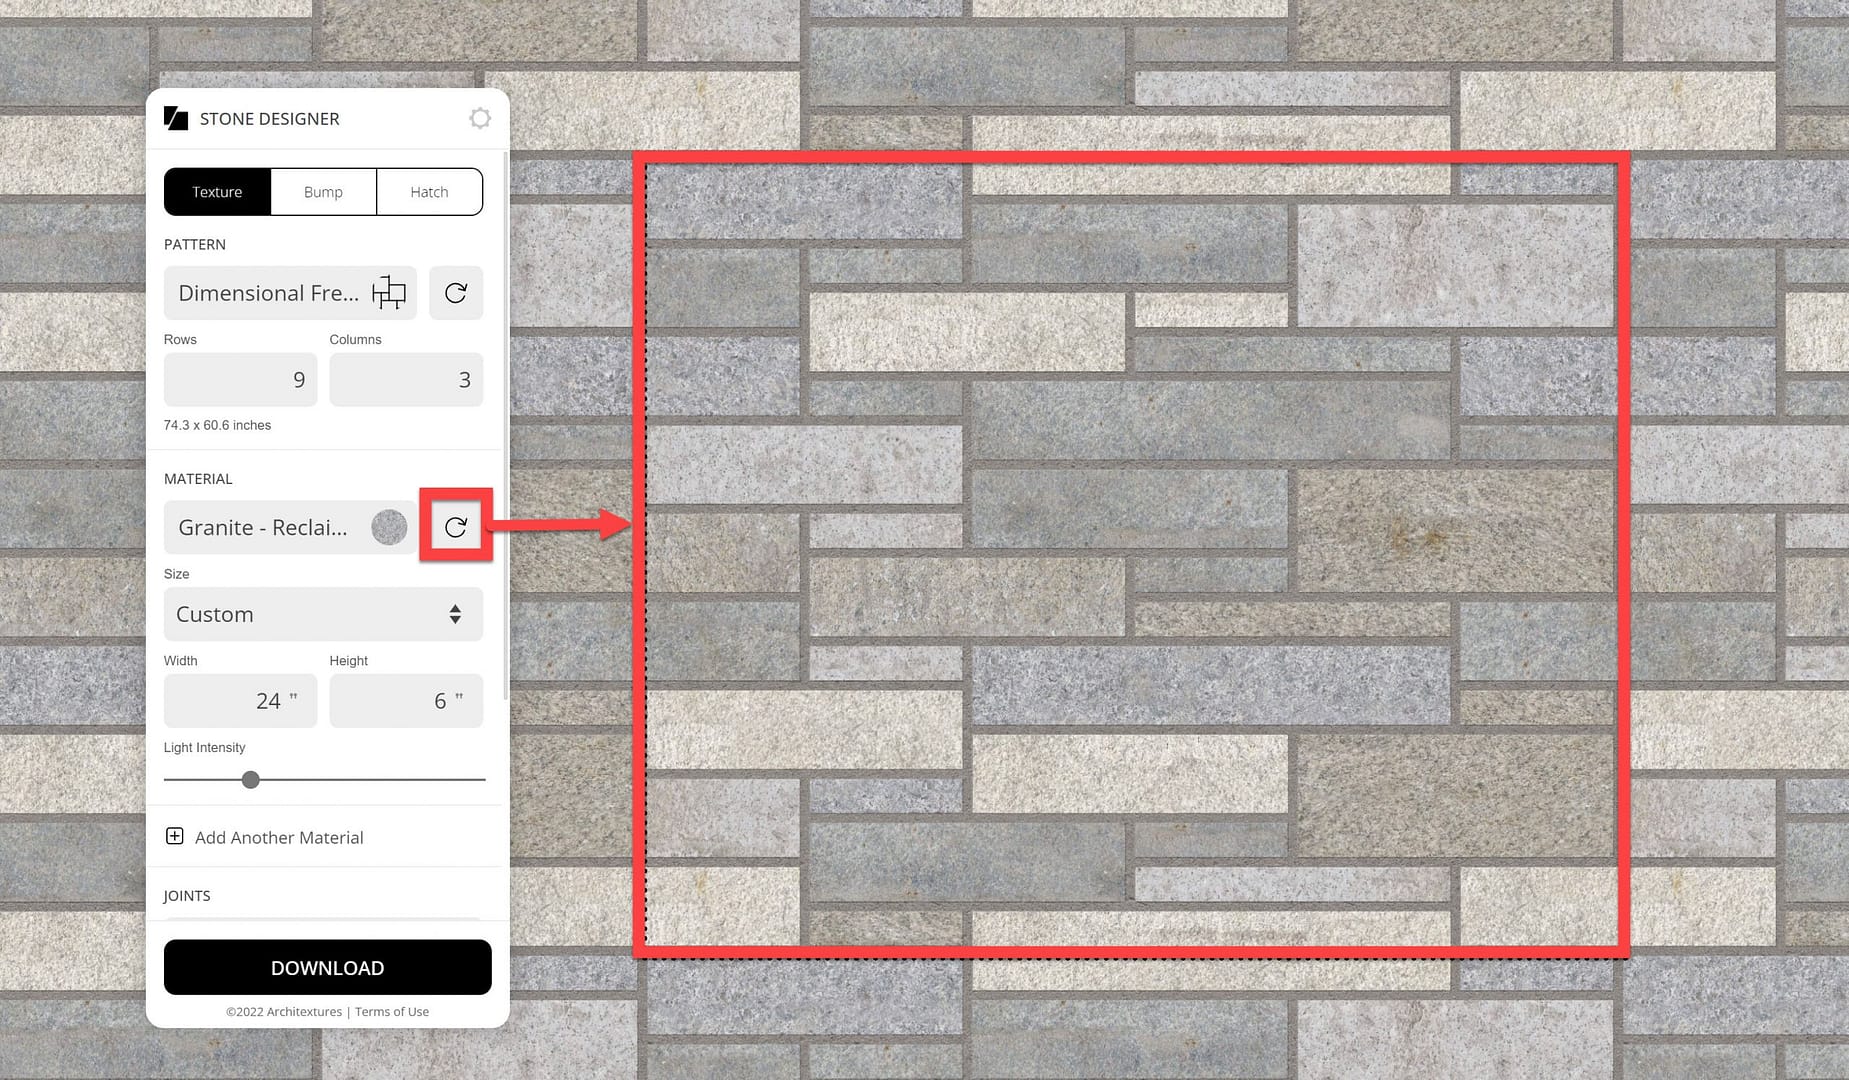
When these images are used to paint the pattern, Stone Designer randomly selects which image is used to paint each stone piece. You can use the refresh icon to regenerate this random selection, then download the result you are most happy with. For example, the images below show three random variations of the same pattern being painted with the same material.
Material Refresh 1
Material Refresh 2
Material Refresh 3
3. Adjust Size/Scale
Many of the same patterns can be used for different applications by adjusting them to the appropriate size/scale. For example, the Dimensional French Adjustable Widths and Heights pattern above can be used for veneer if the size of the largest stone piece set to 18×12” inches (first image below). It can also be used for patio pavers, if the size of the largest piece is set to say 60×18” inches (second image below).
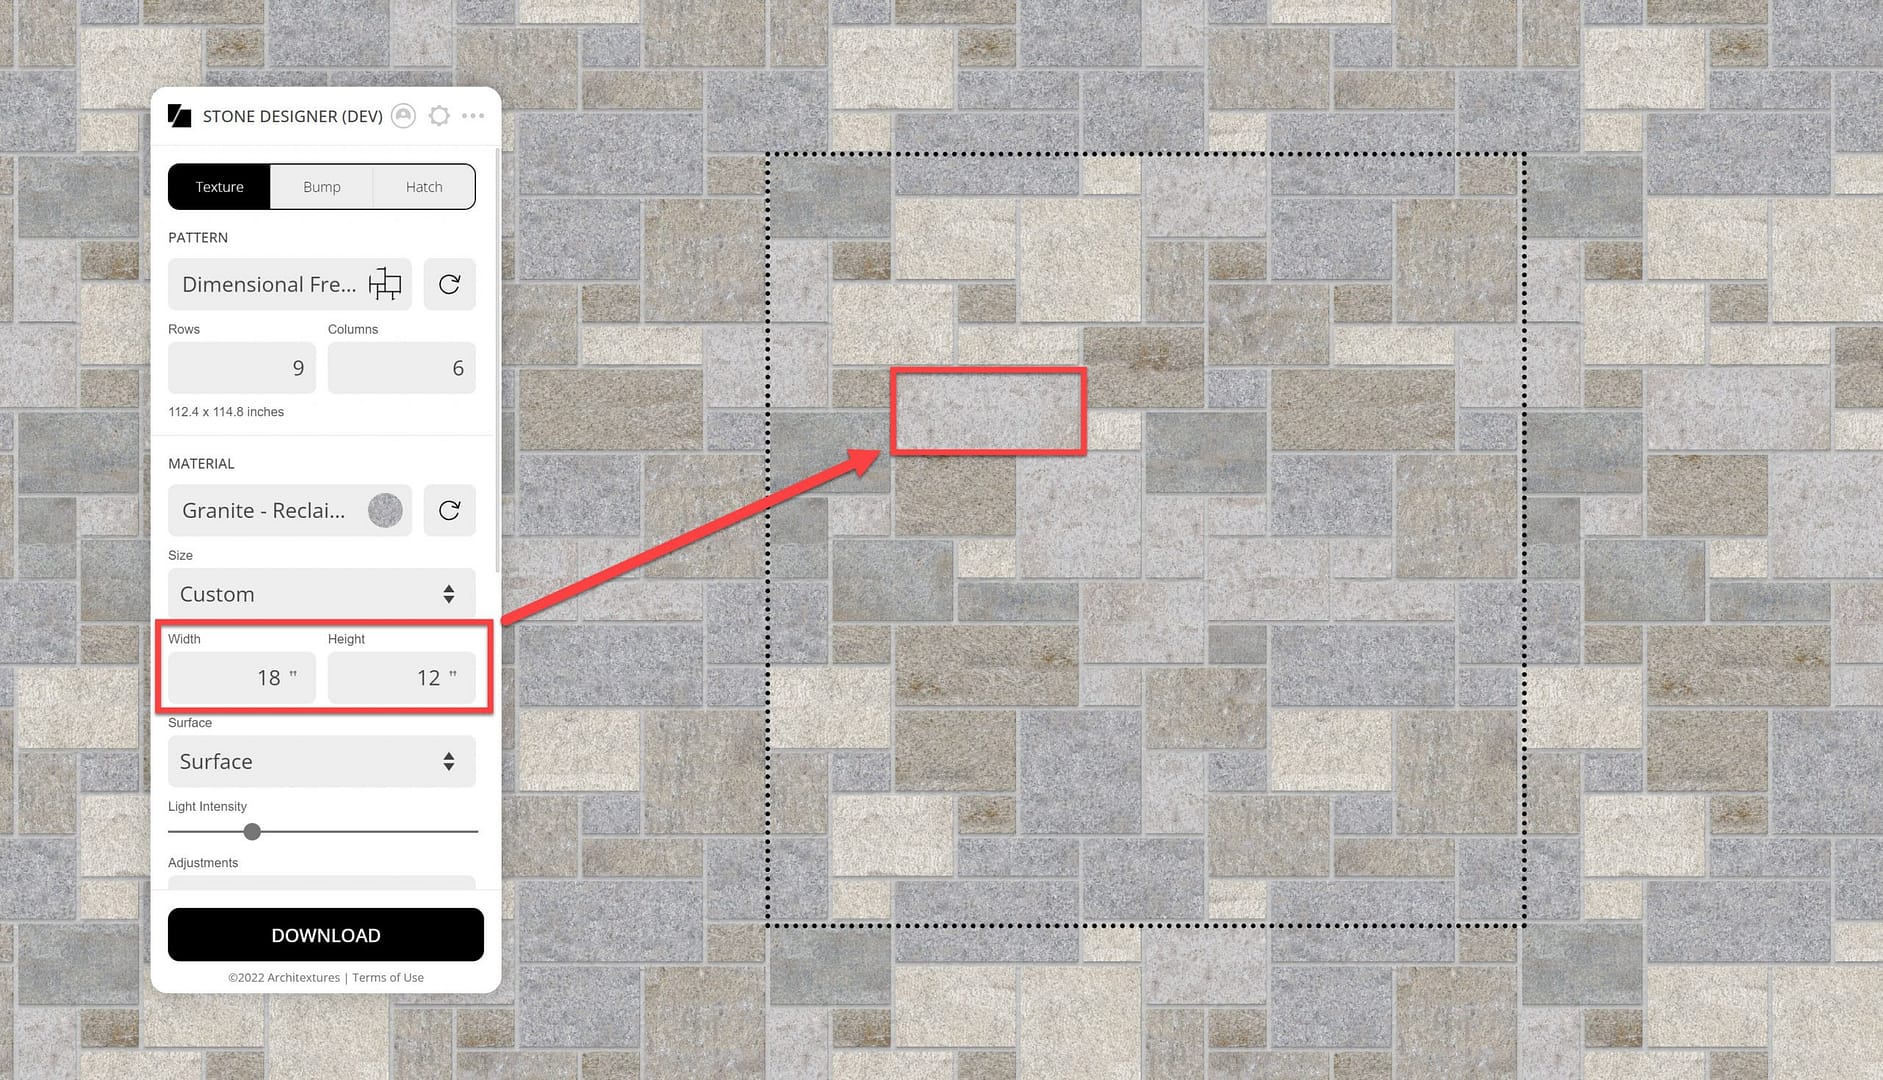
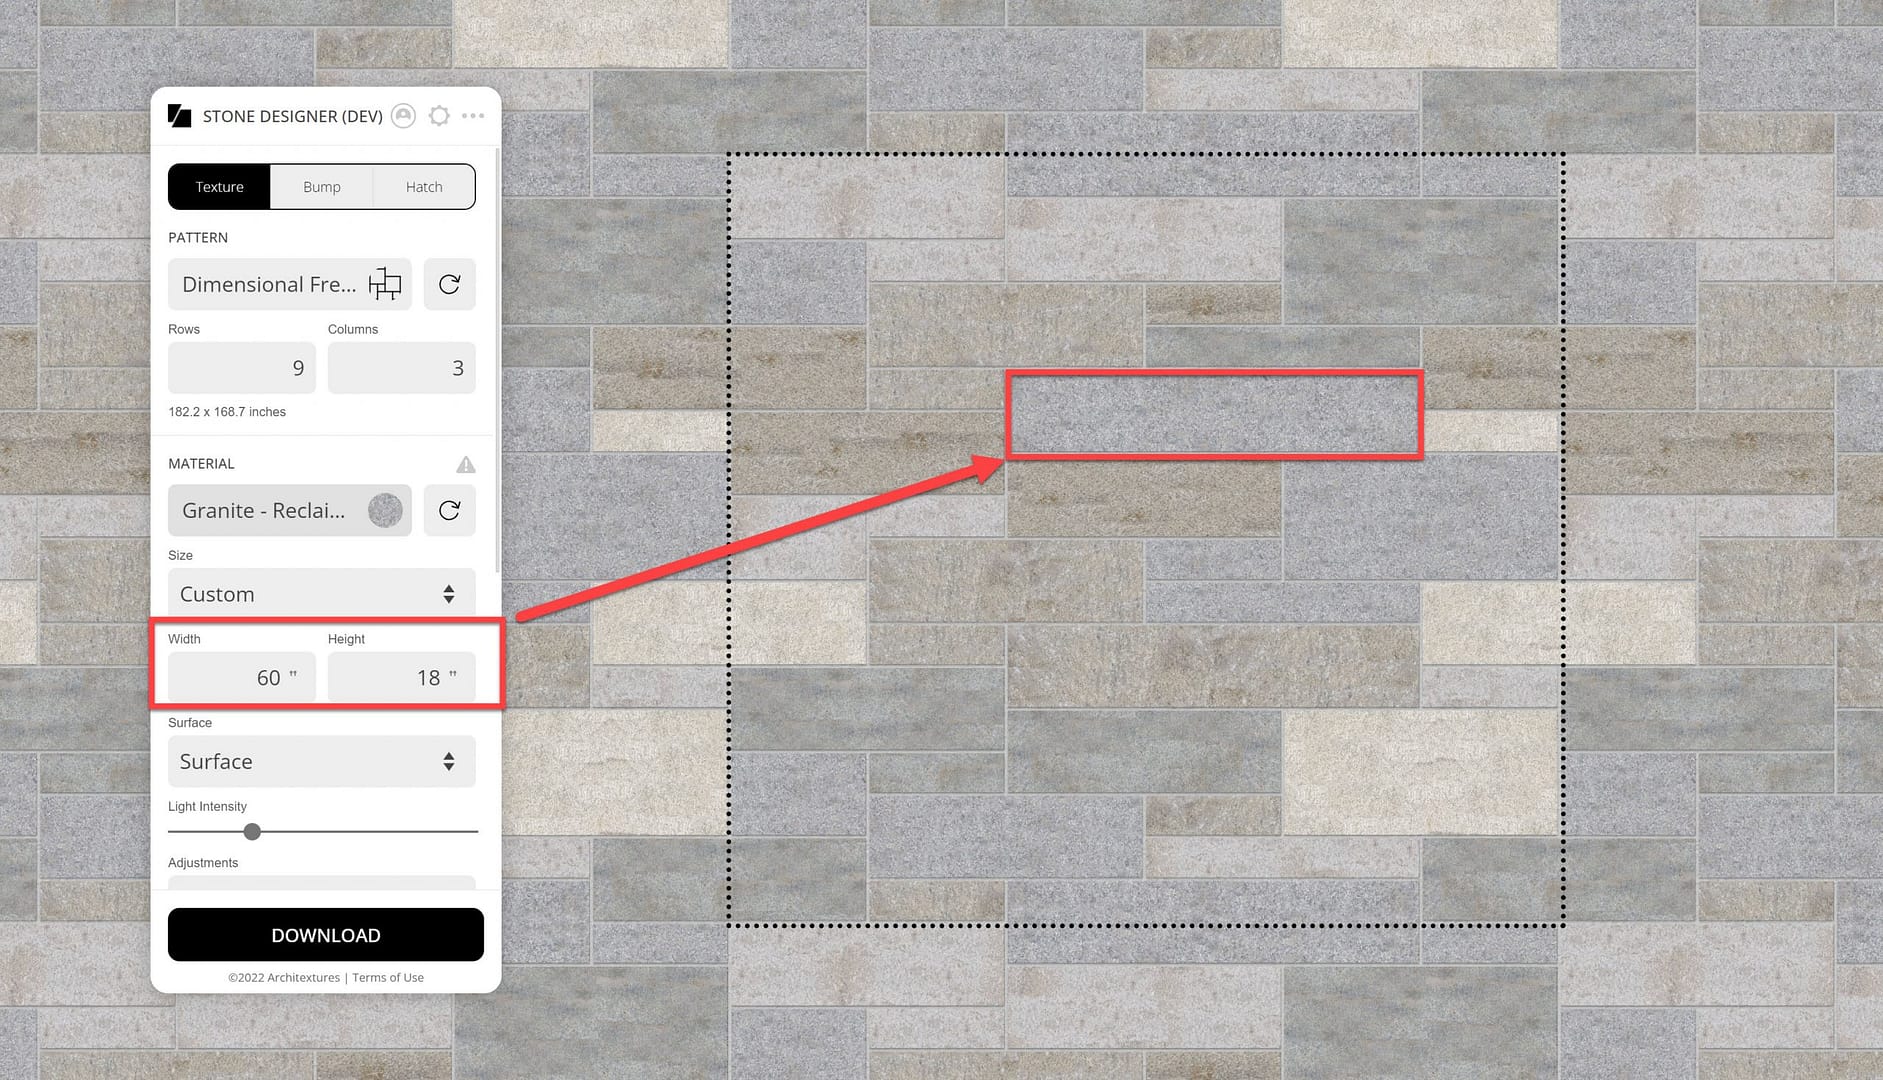
Each Stone Designer Material is created at a known scale. This scale value is used to accurately proportion the image to each stone piece. For examples above, the Granite – Reclaimed Footworn Planks – Cool Color Mix – Weathered & Worn Surface material texture represents a 72×72” stone surface area. If we are applying it to an 18×12” stone piece for a veneer application, then only a small portion of the material texture would be used in the painting process (first image above). If we are applying it to a 60×18” stone piece for a paving application, then a much larger portion of the material texture image would be used in the painting process (second image above).
When applying the material to the pattern, we use a random portion of the available material image area for the painting process. We do this to mimic the randomness of natural stone. Furthermore, if the size permits, we will also randomize the orientation of how the material image is applied. Again, you can use the refresh icon to regenerate these random selections until you see a result that you like best.

Note that as illustrated below the reference width value is always that of the largest stone piece in the pattern as measured horizontally on your screen. The size of all other stone shapes will be scaled proportionally.
In certain patterns it is possible to independently control the reference width and height. So by varying the reference width and height values you can create many pattern variations. These patterns are designated “Adjustable Widths and Heights” in Stone Designer.
4. Adjust Joints
The joints section allows you to select which material is used to fill the space between stone pieces (mortar, earth, grass, etc.). You can also specify fill color.

In the example above, we will change the joint material from course cement mortar to course limestone mortar.
You can try out different joint spacing and recessed joints. In general, dimensional patterns provide the most control over joint spacing. Because of the way other patterns are shaped, they may not allow tight joints (e.g……., fieldstone and flagging patterns).
5. Experiment
For certain materials, it’s possible to experiment with different stone surfaces. Only the applicable surface options will be displayed for the selected material. If you do not see the Surface selector, that means that applying other surfaces to this material is not applicable. Learn more about stone surfaces and finishes.
From left to right below: Imperial White Limestone material in its standard smooth sawn surface; with a simulated bush hammered surface; and with a simulated grooved surface.
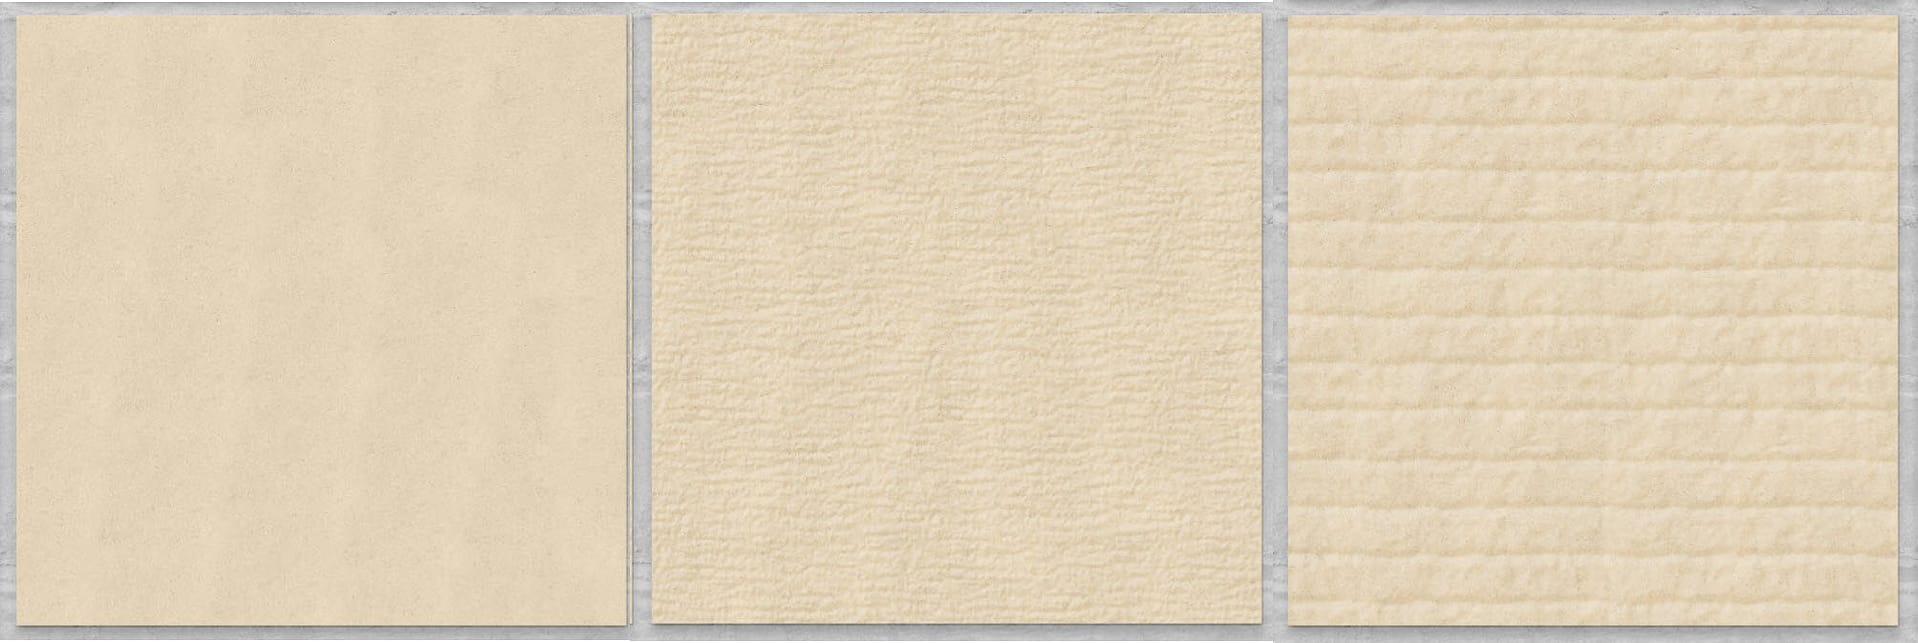
Similar controls are available for experimenting with different edge styles. From left to right beLow: Imperial White Limestone material with a simulated leathered surface shown with standard straight sawn edges; with simulated rough edges; and with simulated handmade edges.
One of the most powerful capabilities of Stone Designer is the ability to combine multiple material variations in the same pattern to create truly unique designs. To start, click the Add Another Material button. You can select a different material, a different surface finish, or a different edge style.
In the example above, we started with Bavarian Beige Limestone – Split Face Surface material with standard straight sawn edges, then experimented with adding some pieces of Bavarian Beige Limestone – Sandblasted Finish, then some Bavarian Dolomite Gray Limestone – Sandblasted Finish, and finally some Bavarian Gray Limestone – Bush Hammered Finish. The result is something unique!
A few practical notes about mixing stone materials:
- In general, they should be the same stone species (limestone for the above).
- In general, they should be from the same source (our Bavarian quarry partner for the above).
- If you adhere to these guidelines, then materials can be mixed with no additional costs or shipping delays.
6. Download CAD Resources
The download function creates CAD resources. Currently, three types of resources are available for download:
Texture Map – This is a JPG file that contains an image of the materials texture. Some CAD rendering systems refer to these as texture images or color maps. This is the primary file making up the CAD material texture. In addition to renderings, this image can be shared with clients and used in presentations.
Bump Map – This is a JPG file that contains information on the surface profile of the stone. Some CAD rendering systems refer to these as normal maps (strictly speaking, while bump and normal maps serve similar purposes, they are different).
Hatch – This is a PAT file for use in Revit and AutoCAD applications. Stone Designer breaks complex patterns down into short horizontal and vertical lines. Note that the file naming is very specific for these files and should not be changed.
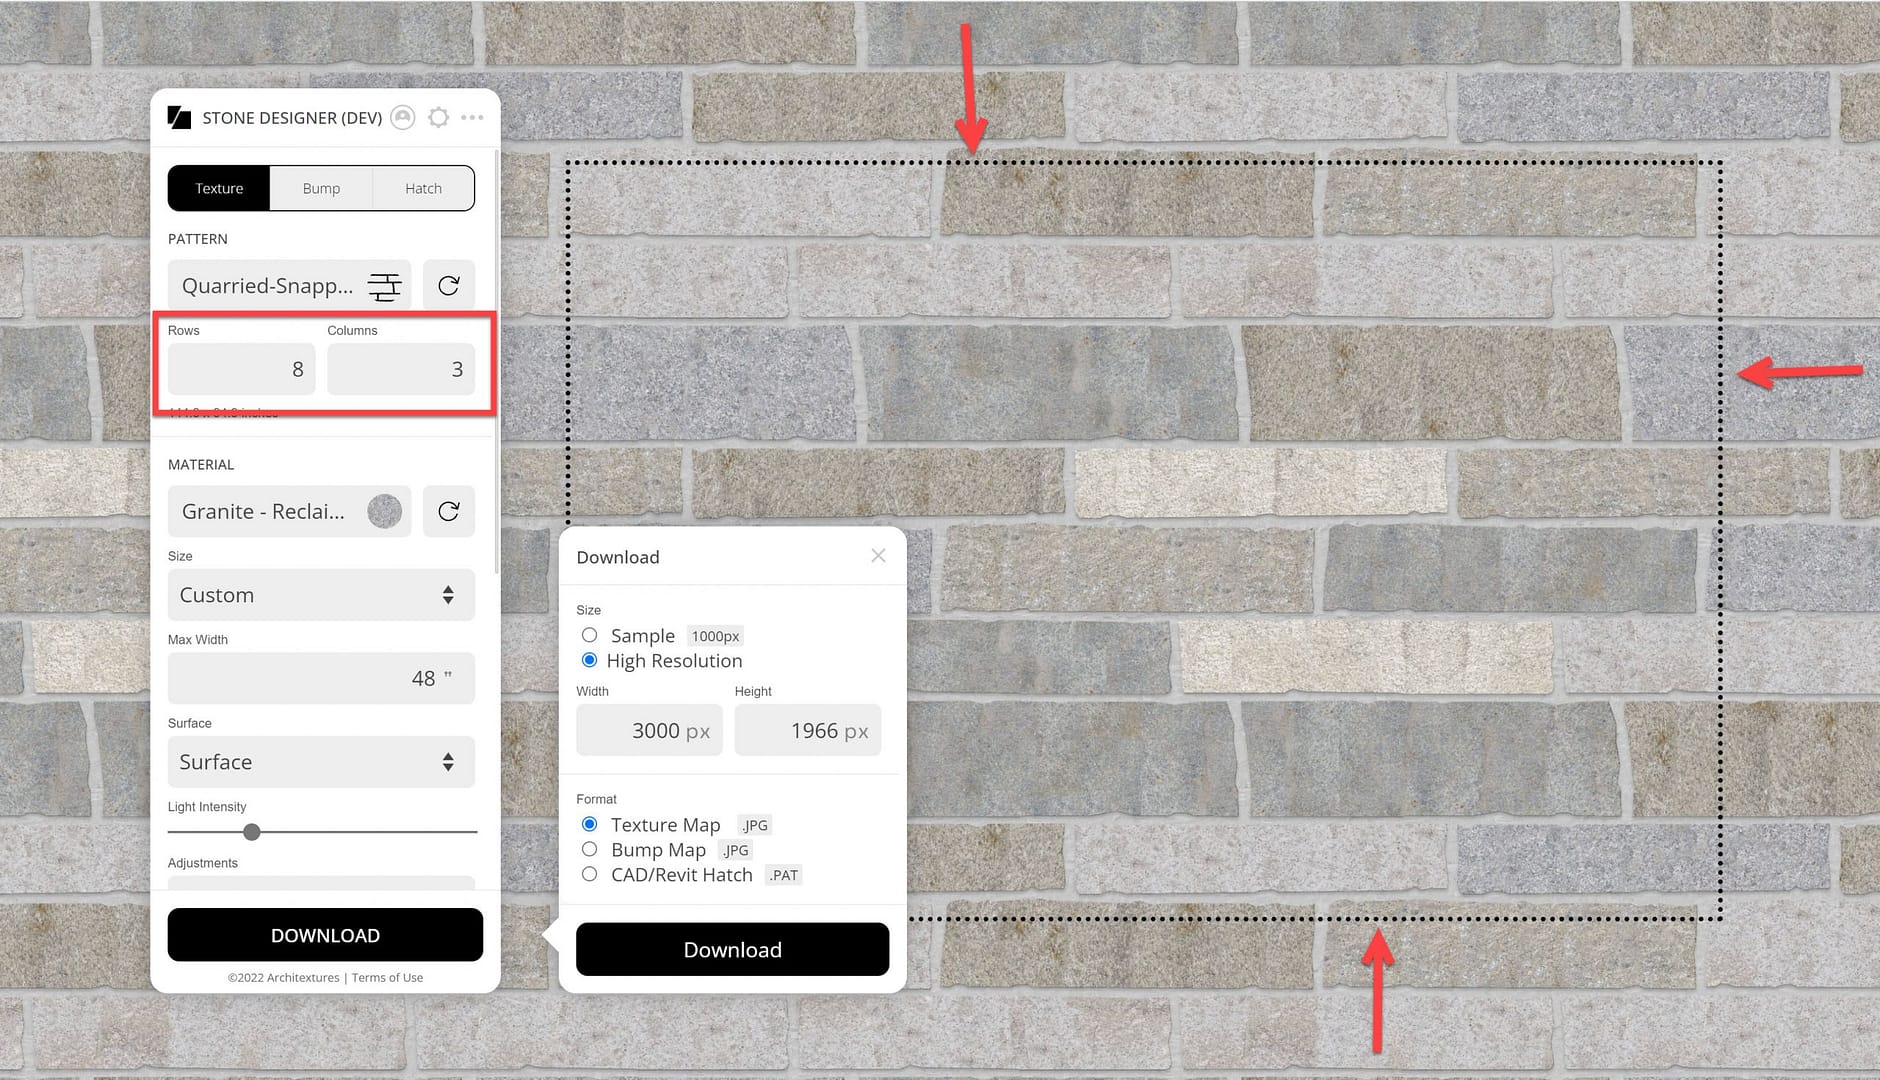
Which maps you use will depend on your rendering software. In all cases, the maps cover the area contained inside the dotted rectangle. This downloadable area is seamless, meaning it can be applied repeatedly over a large area with minimal tiling effects.
You can control the overall number of stone pieces contained in the downloaded area by using the rows/columns setting. One tip worth noting: use a higher rows/columns setting if you see too much repetition in the downloaded CAD material texture. This will lessen the resolution of the stone pieces but may produce a better rendering.
Above is the downloaded JPG texture map. Note that the width x height information will be contained in the file name. You will use these values for scaling the material texture correctly in your CAD rendering. Because of the way that joints work in some of our irregular patterns, we suggest that you use the width value only and lock the aspect ratio to obtain the height.
Below are a few renderings created with this downloaded JPG texture map.
Ready to give the Stone Designer a try?
Rendering natural stone realistically just got a whole lot easier. The challenges of finding high resolution images of stone which can actually be obtained, dealing with scale issues, depicting color and surface finish variations accurately, tiling issues, and creating advanced CAD rendering map files are all solved by using our Stone Designer tool.
Use our free Stone Designer tool to visualize various stone materials in different design patterns. Experiment with color, surface finish, shape, size, joints, and mortar. Blend a variety of stone materials to create something unique and apply it to your CAD drawings. When you’re done experimenting, download the finished CAD material texture for use in your renderings and presentations.
While obtaining actual stone samples for physical mockups may still be needed, using Stone Designer will help you focus on obtaining the right samples more quickly. Our goal is to save you time, and land on a finalized plan your clients love.
