Skip to content
 INSPIRATION BOARDS TUTORIAL
Overview
Create presentations for your upcoming projects using our Inspiration Boards tool
Our tool allows you to save stone images to “inspiration boards” that you create. Similar to Pinterest, you can organize the images, write notes, and, when you’re ready, share a URL link to the board with colleagues or clients.
While it’s possible to create an inspiration board as a guest (we call this board “Favorites”), we highly recommend creating an account and logging in. This will allow you to access all the inspiration boards’ functionality and save them securely.
Use Without an accouNt
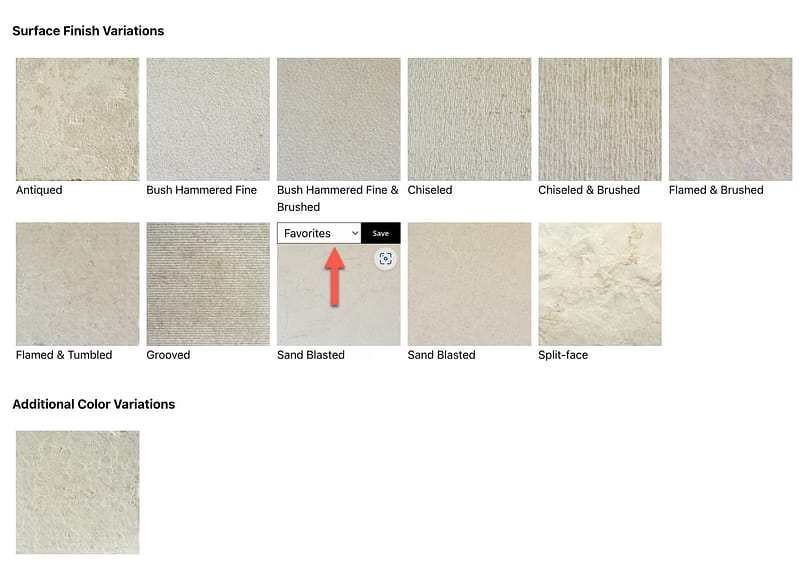
You can save (almost) any stone photo to an inspiration board form any page on our website. Hover your mouse atop a photo. If you see the Save option, the image can be saved to a board.
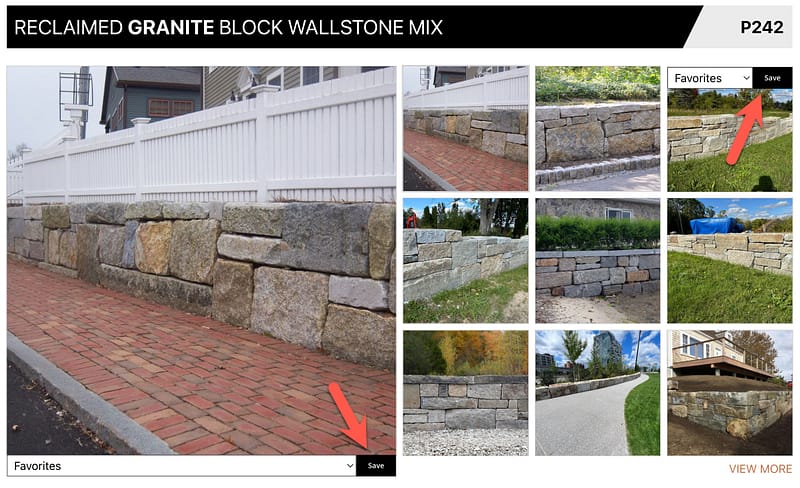
The box to the left of Save indicates the currently selected board. Every user starts with a default Favorites inspiration board where you can save images without an account. Later in this tutorial, we’ll show you how to create a new board and rename, edit, and share existing ones.
To add an image to an inspiration board:
Hover over any (almost) any stone image.
Click the Save button in the upper right corner of the image.
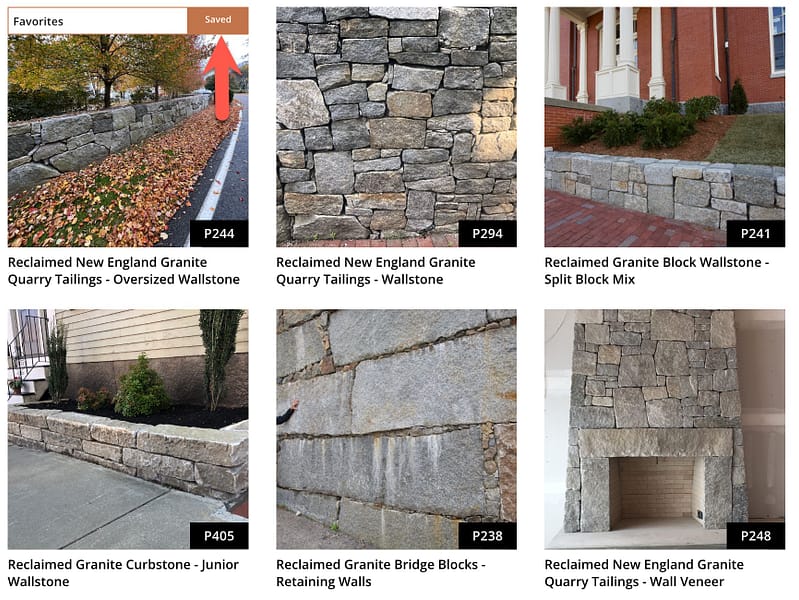
The word Save will change to Saved, indicating that the stone has been saved to the selected collection.
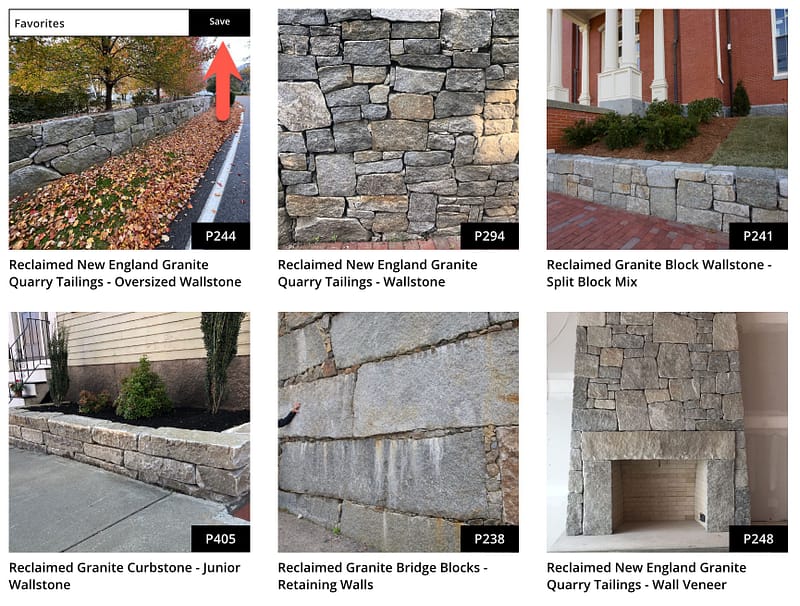
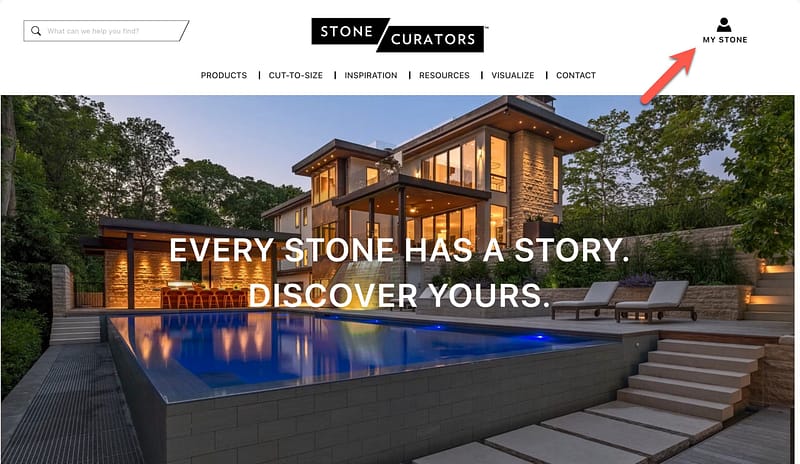
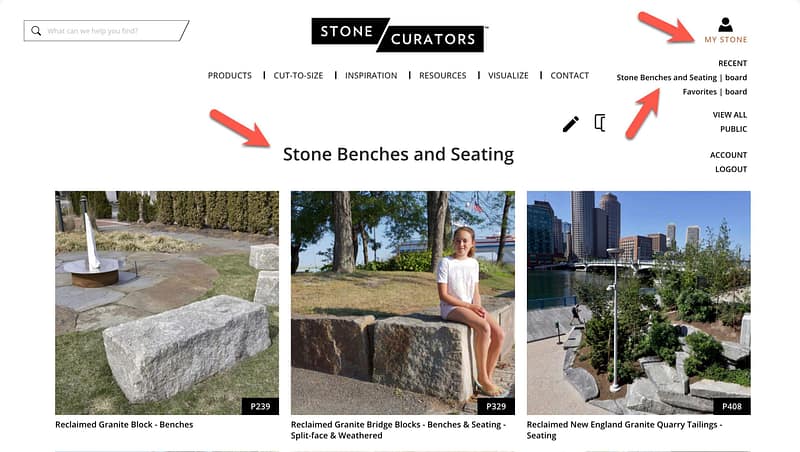
To view your Favorites board, click the MY STONE menu item in the upper right corner of the page.
Then click “Favorites | board“.
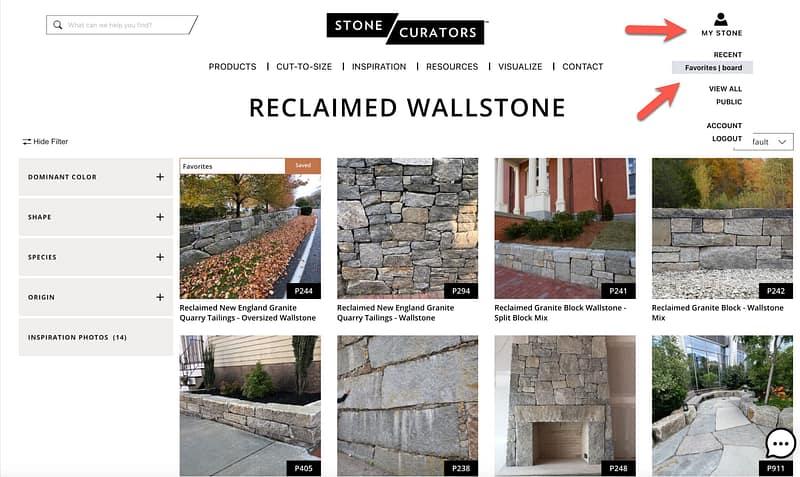
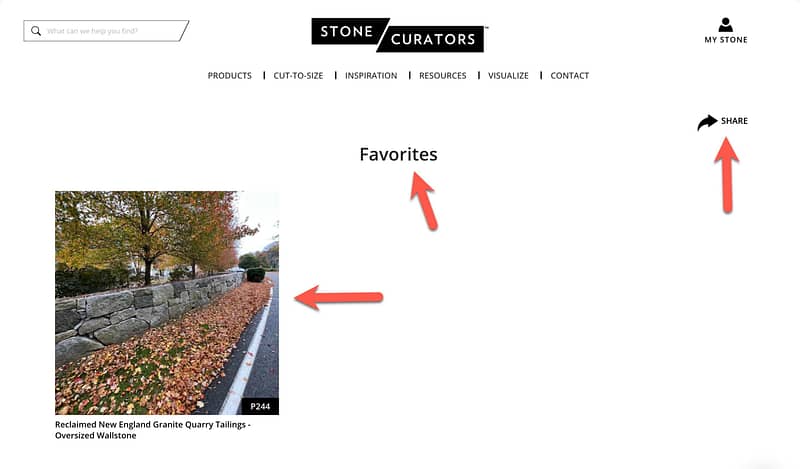
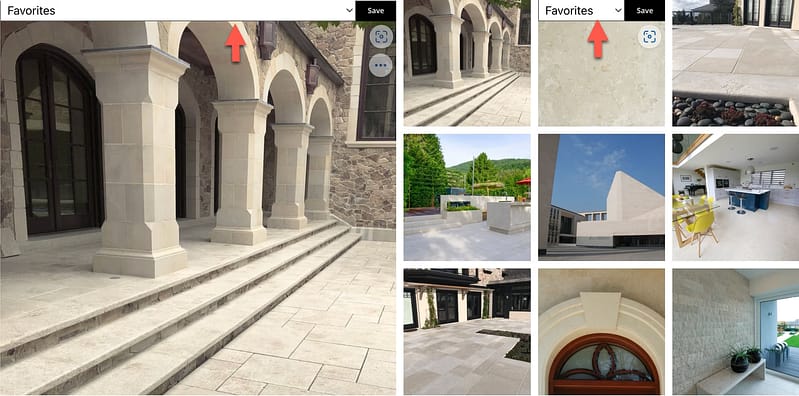
Below, you’ll see the Favorites board displayed with the saved image. Repeat the process to save additional images.
When ready, use the SHARE function to share your board with clients, colleagues, and friends.
Use With an account
While it’s possible to a Favorites board as a guest, we highly recommend creating an account and logging in. This will allow you to access all the functionality and save your boards securely. This includes:
– Creating different boards for different projects.
– Adding custom names and descriptions to your boards.
– Rearranging the order of the images.
– Customizing the “look” of the boards.
– Ability to “embed” inspiration boards into your own web pages.
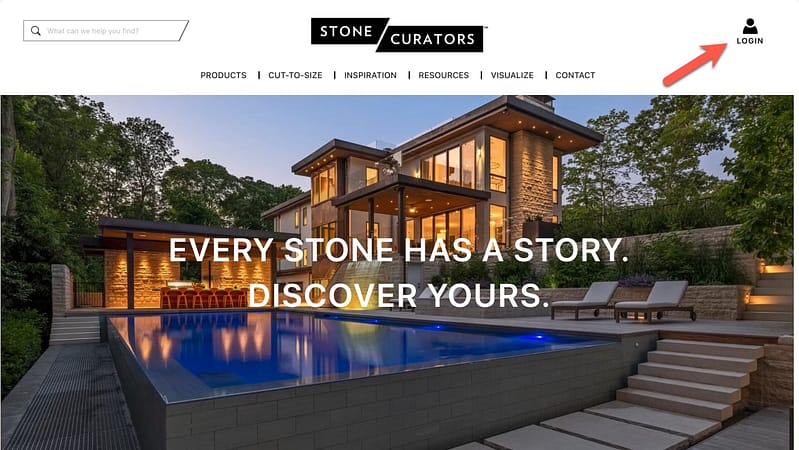
To login or create an account click LOGIN, located at the top right.
A LOGIN box will display. If you already have a My Stone account, enter your email and password and click the LOGIN button.
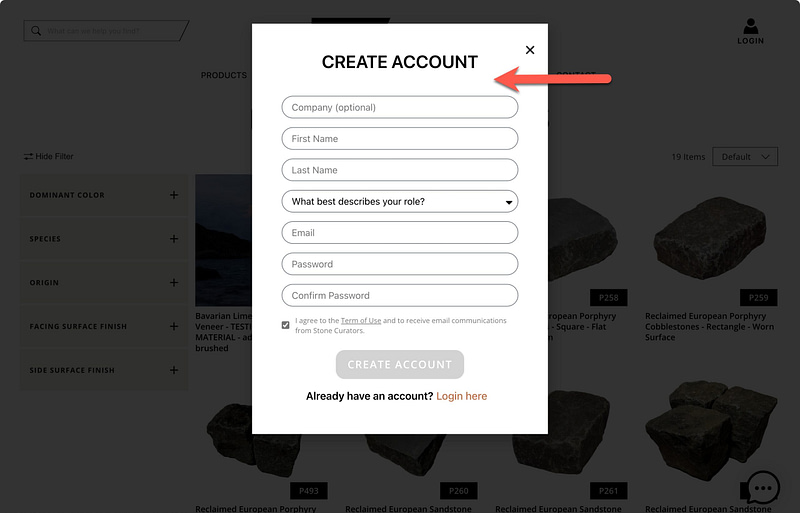
If you do not have an account yet, click CREATE ACCOUNT.
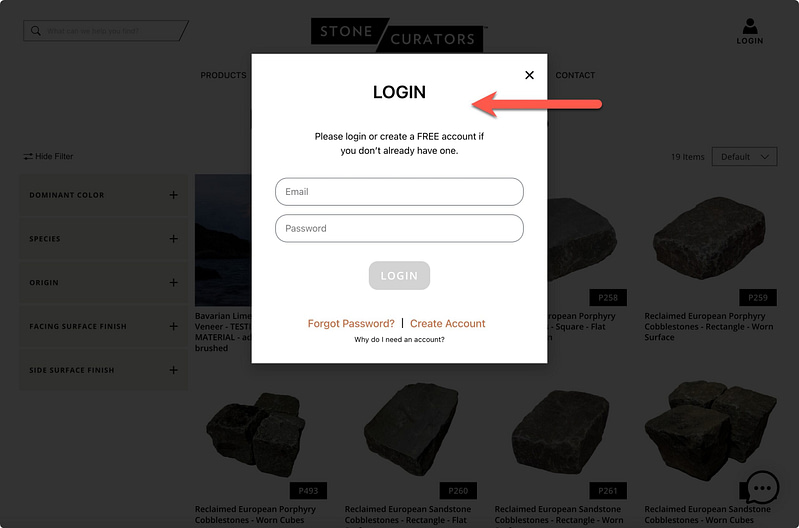
Enter your information and click the CREATE ACCOUNT button.
You’ll see that you’re logged in when the LOGIN menu item changes to MY STONE.
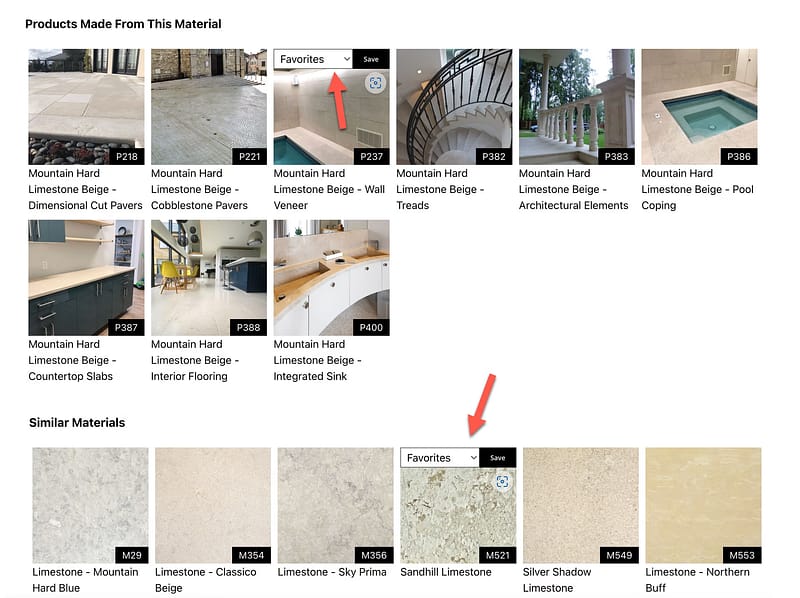
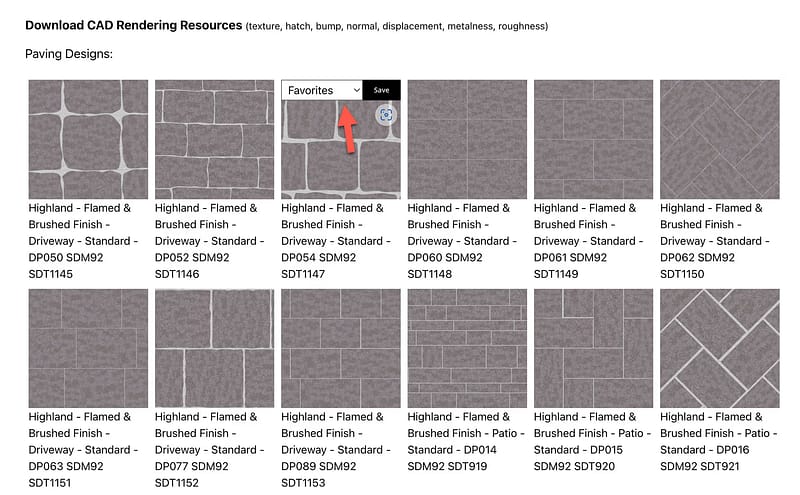
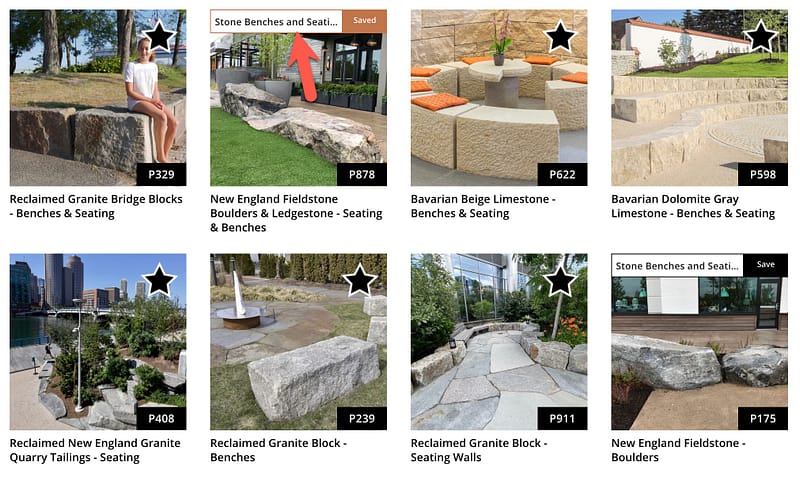
SAVE FROM ANY PAGE
You can save (almost) any stone photo to a collection from any page on our website. Hover your mouse atop a photo. If you see the Save option, the photo can be saved to an inspiration board. Here are some examples …
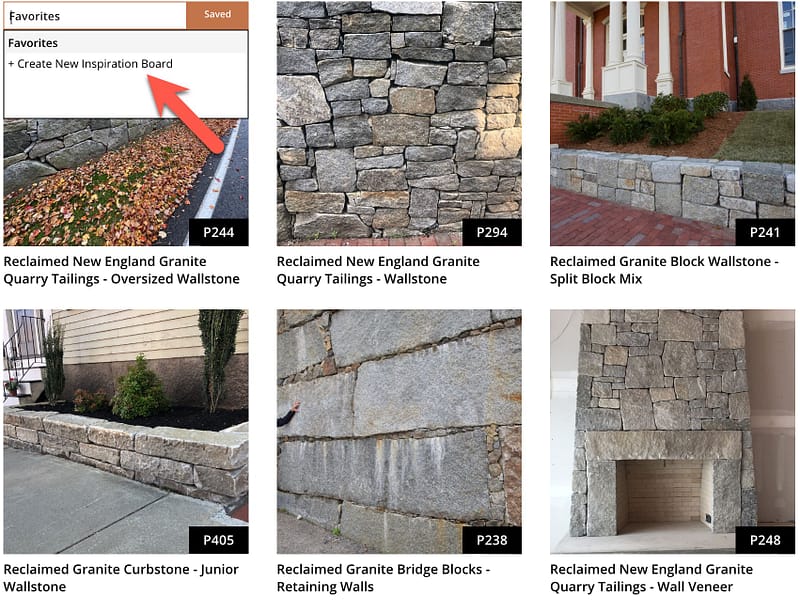
CREATE NEW BOARD
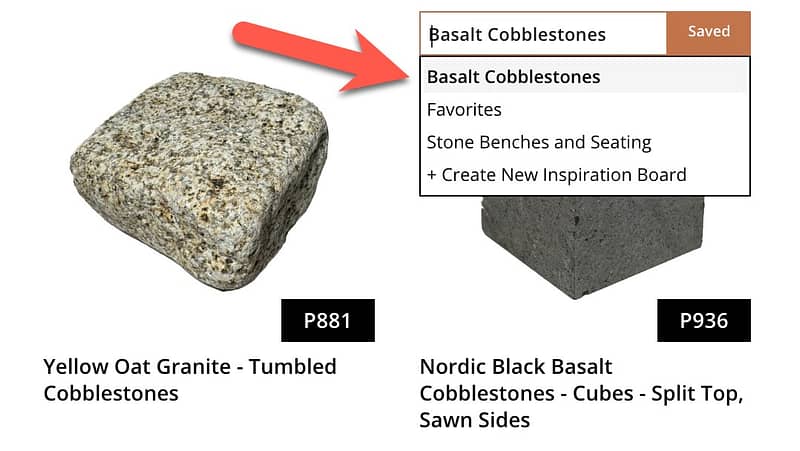
You can create a new board any time you see the Save function. Hover over the Save control until you see the list displayed. Then click “Create New Inspiration Board“.
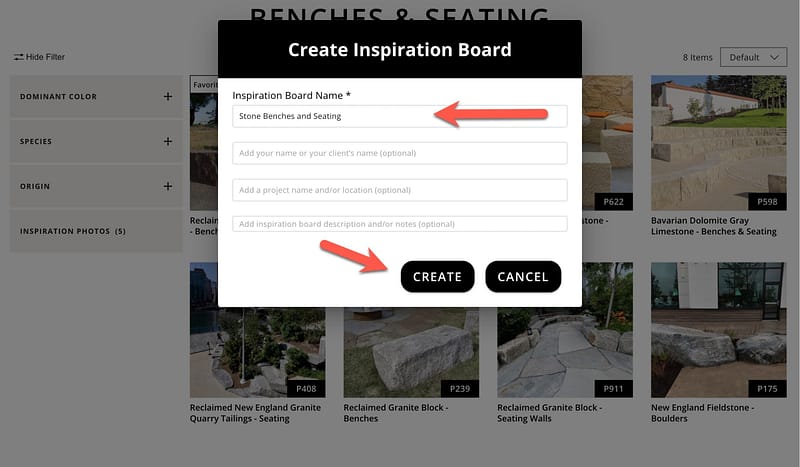
Name your inspiration board; in this case, we’ve named ours Stone Benches and Seating.
The additional annotation fields are optional. You can enter text now or later by editing your collection.
Click the CREATE button.
Now you’ll see the new inspiration board name displayed when hovering over the Save control.
Images will now be saved to the new Stone Benches and Seating board.
To view your new collection, select it from the MY STONE menu, located at the top right.
SWITCH BETWEEN BOARDS
To switch between inspiration boards:
Hover over the Save control.
Select the desired board from the dropdown list.
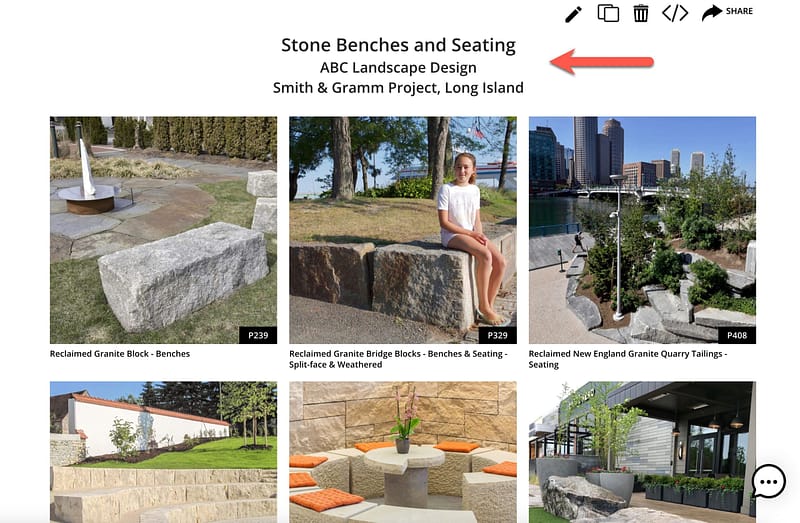
RENAME & ANNOTATE
To rename or annotate a board:
Click the pencil icon in the upper right of the board page.
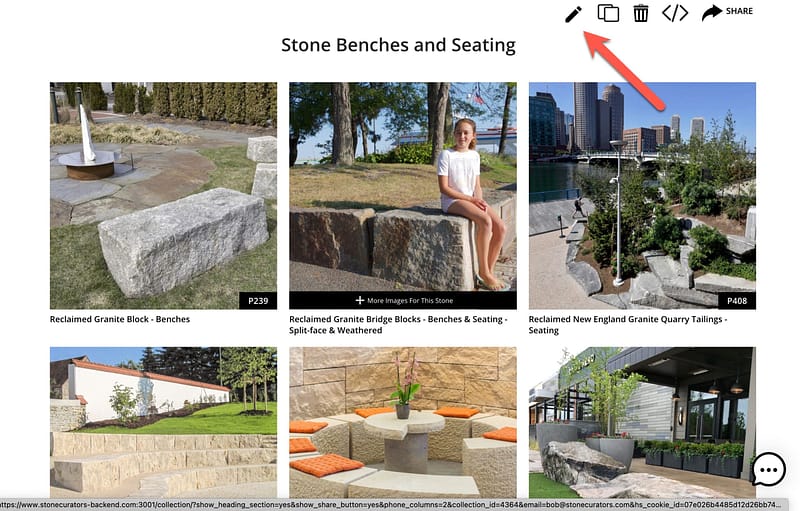
The page will change to edit mode, where you may:
- Edit the board name.
- Add your name or your client’s name.
- Add a project name and/or location.
- Add a description and/or notes.
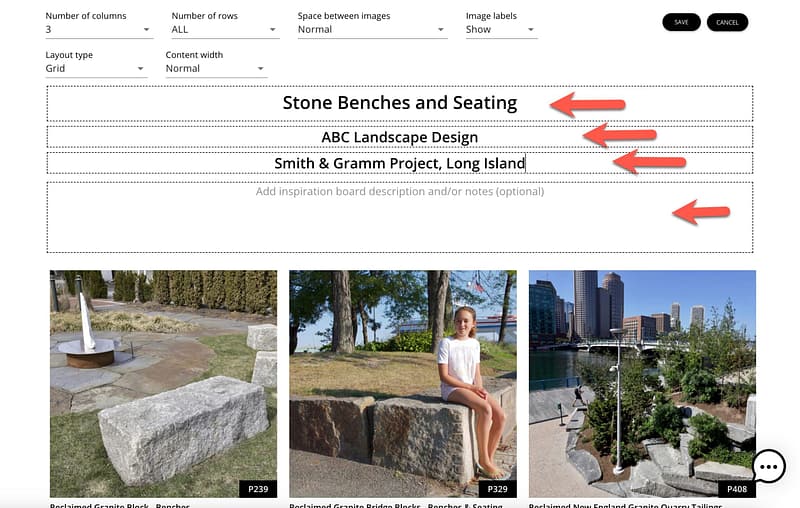
In this example, we edited the board to add client and project information.
Click the Save button when you’re done.
The inspiration board page now displays the new annotation.
REARRANGE IMAGES
To change the display order of images in a board:
Click the pencil icon in the upper right in the board page.

Hover over the image you wish to move.
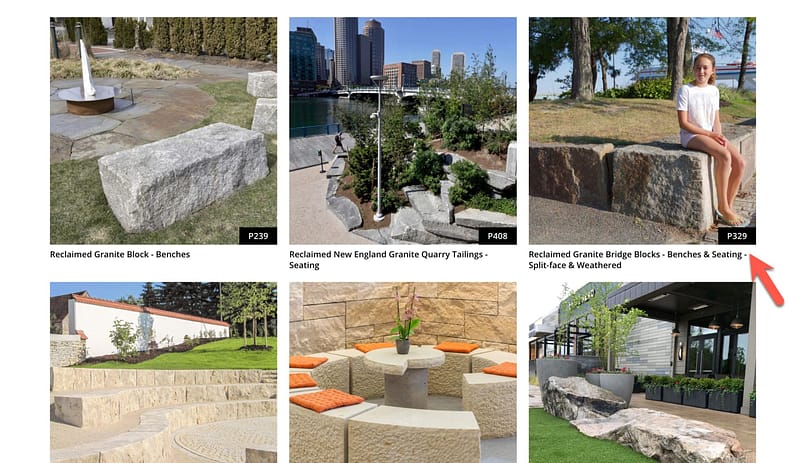
Click, drag, and drop the image to the desired location. In this example, we move P329 from the second position in the first row to the third position.
Click the Save button when you’re done.
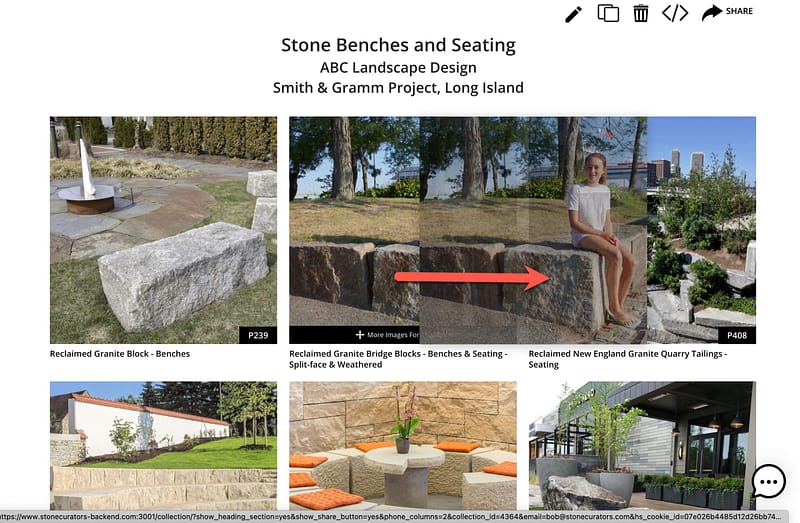
The image for P329 is now displayed in the new position.
EDIT LAYOUT
To change the layout of a board:
Click the pencil icon in the upper right of the board page.
You can change any of the following layout options:
- Number of columns to display.
- Number of rows to display (with “View More” if any images are hidden)
- Space between images.
- Show or hide image labels.
- Layout type (grid or masonry).
- Content width of the page.
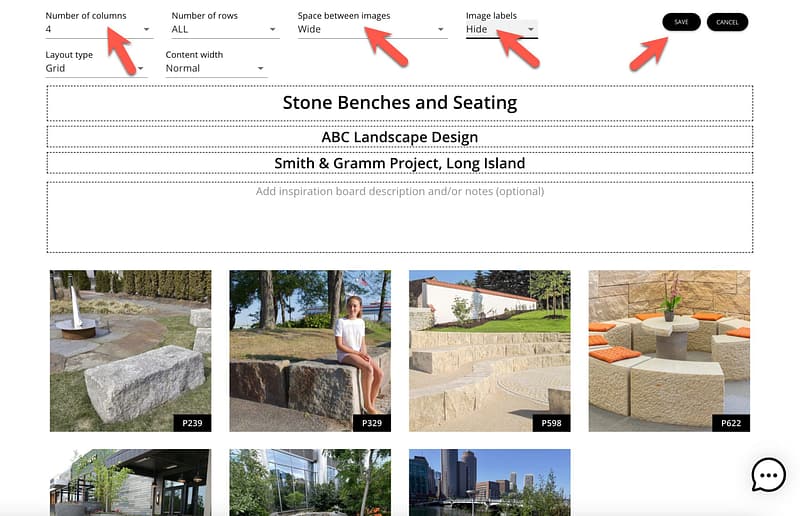
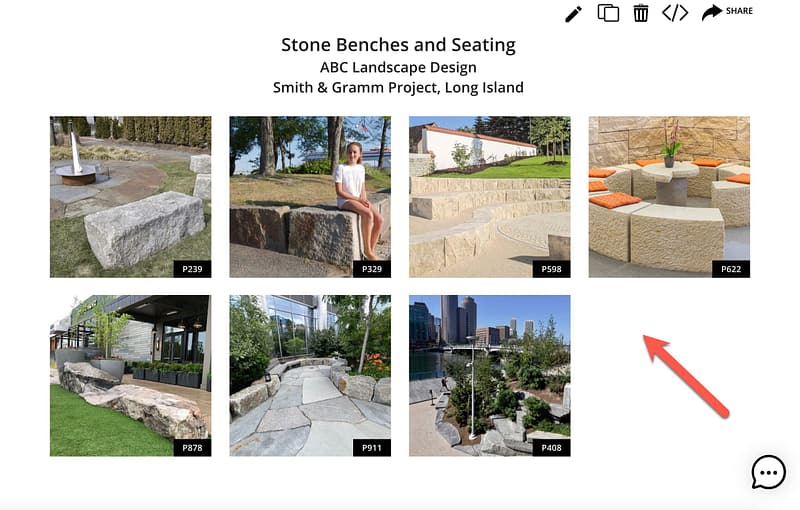
In the example above, we change the space between images to “wider”, switch to a four-column layout, and hide the product labels.
Then click the SAVE button.
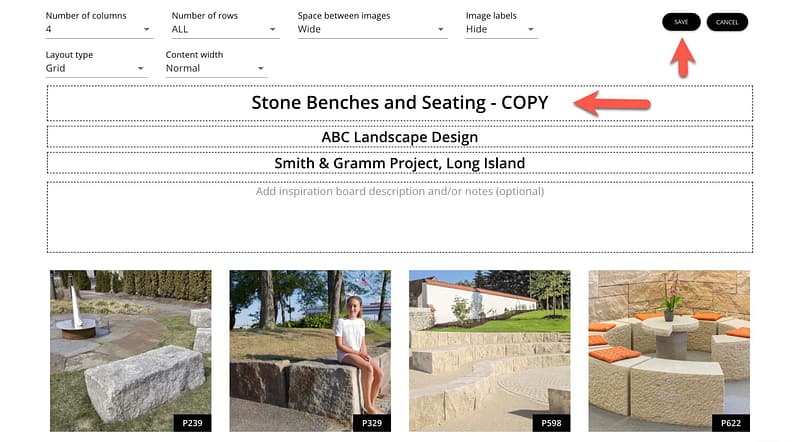
CLONE
To duplicate or clone a board:
Click the clone icon in the upper right on the board page.

The cloned board will display in edit mode. Be sure to rename it, then click Save.
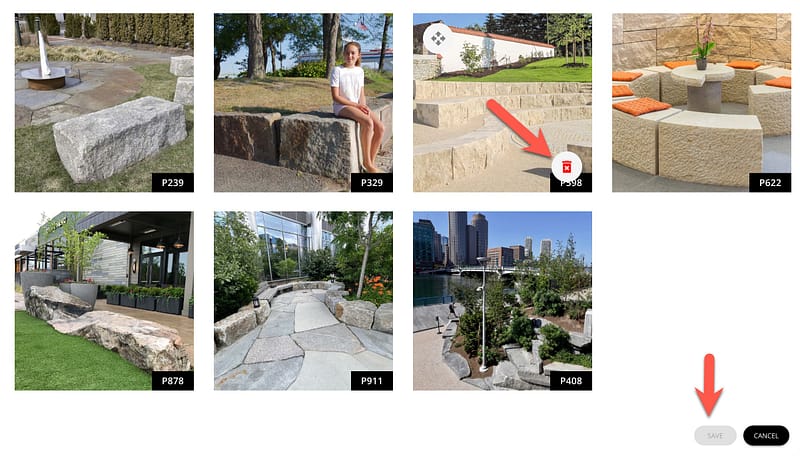
DELETE
To delete an image:
Click the pencil icon in the upper right of the board page.
Hover over the image you wish to delete.
Click the trash can icon.
Be sure to click SAVE when done.
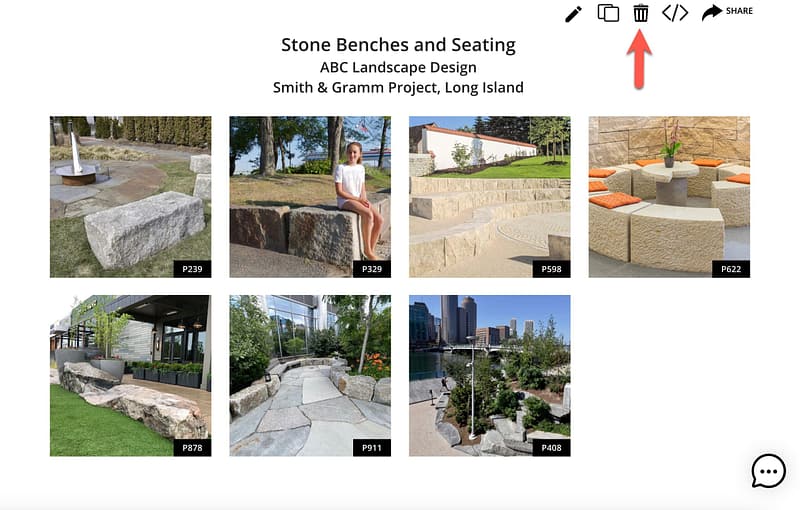
To delete a board:
Click the trash can icon in the upper right on the board page.
EMBED
The embed function allows you to add the board to your own web pages using an “iframe”.
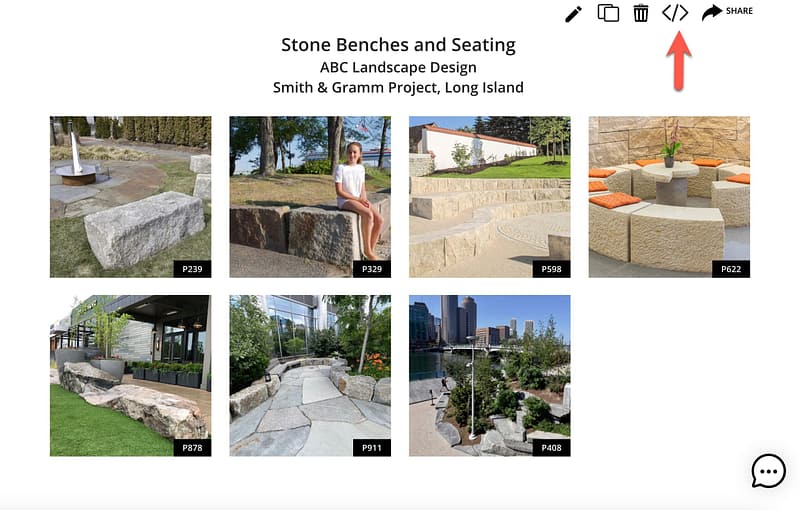
Click the Embed icon. A pop-up will display the needed iframe code. Copy this code and add it to your own web page.
Note that after you embed a collection in a web page, any subsequent changes made to the collection will display on your web page.

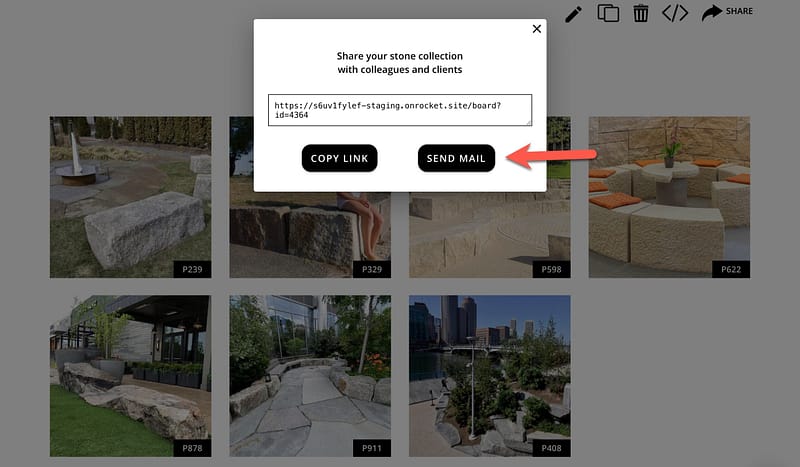
SHARE
To share your collection with other people, click the SHARE icon in the upper right corner of the board page.

You can then copy and email a link to the board to a work colleague, client, or friend.
Easy as that!