 Skip to content
 Stone Designer Textures for AutoCAD: installation and use
Overview
Start by watching our 3-minute Stone Designer video tutorial.
The tutorial video quickly outlines several important tips and tricks for creating CAD textures in our Stone Designer tool and for downloading the textures to use in your CAD and Rendering software.
This tutorial will show you step-by-step instructions for installing and using these texture files in AutoCAD. Separate tutorials are available for Revit and Sketchup.
DOWNLOAD THE FILES
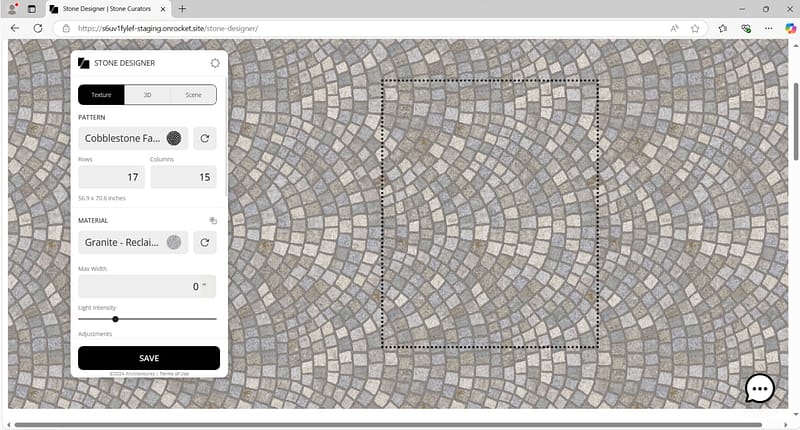
This is Stone Designer user interface.
Following the Stone Designer tutorial, you can play around with the settings to obtain the required textures for your AutoCAD project.
After customizing your stone design patterns, click “Save,” select “Texture,” and then click “Download.” This will download the stone texture file to your computer.
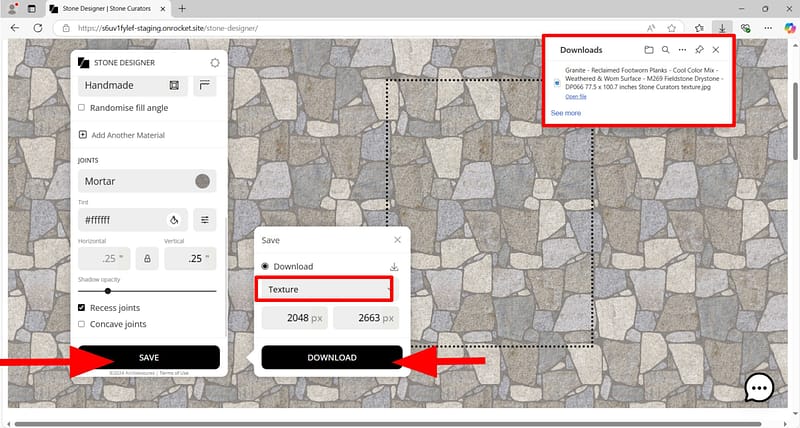
Repeat, this time selecting “Bump,” clicking the “Save” button, and then clicking “Download.” This will download the bump map file to your computer.

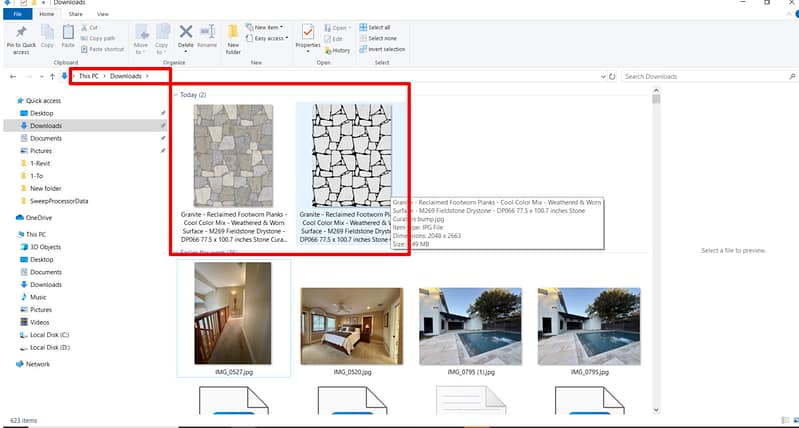
You can find the texture and bump files in your downloads folder. Move them to the project folder.
Install in autocad
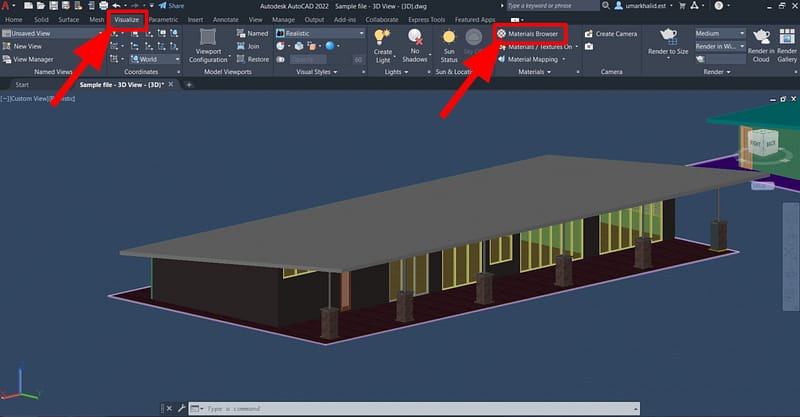
Open the Autocad Project Design file where you wish to use the texture.
Go to the “Visualize” Tab and click on “Materials Browser” to open Material Browser.
Below is the Material Browser Panel.
Click on the “Create New Material” Button and Select “New Generic Material.”
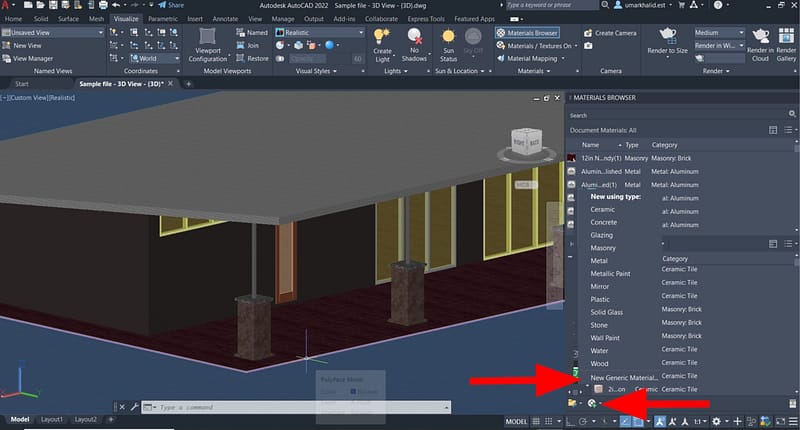
Rename the newly created material texture for easy identification (e.g., DP066).

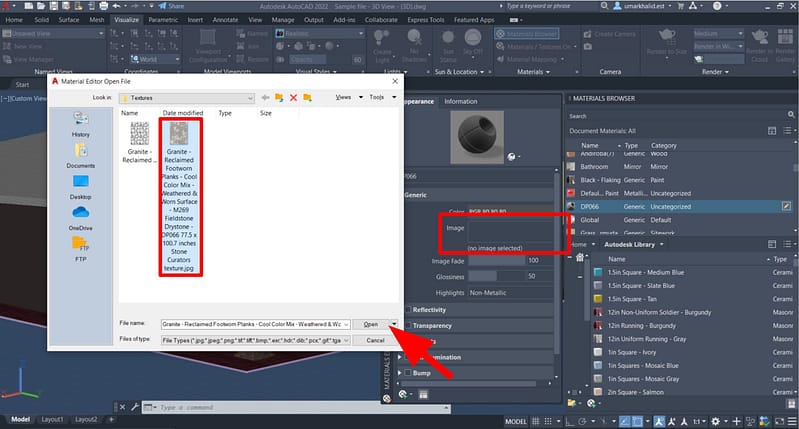
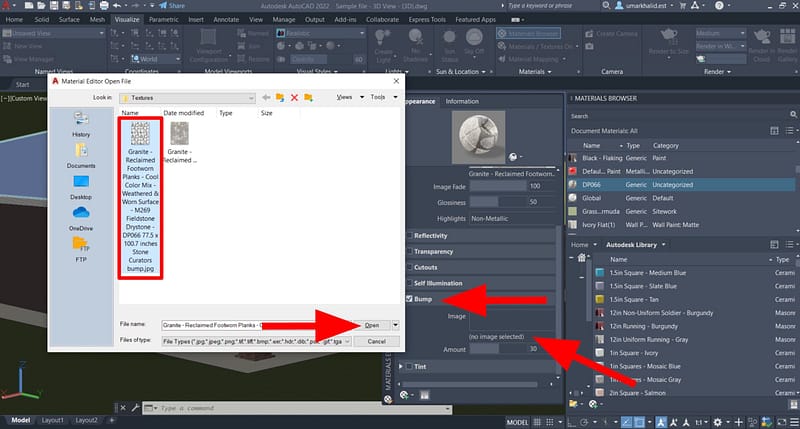
You can see the text “no image selected” below the box in front of the “Image” section.
Click on that text to open the file browser.
Select the material texture file from the location where it was previously saved and click “Open”.
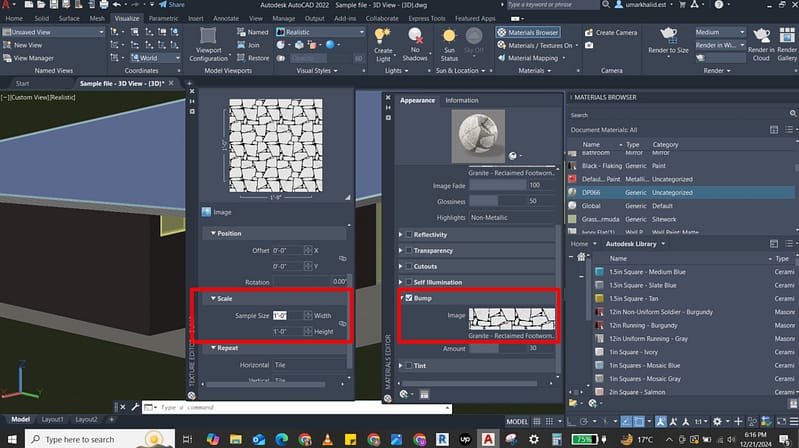
The material texture is added in front of the image. Next, we need to scale the AutoCAD material to the size we created in Stone Designer.
To scale the material, click on the image, and the Texture Editor will appear.
By default, the material texture image is scaled 1’ x 1’ (which needs to be changed).
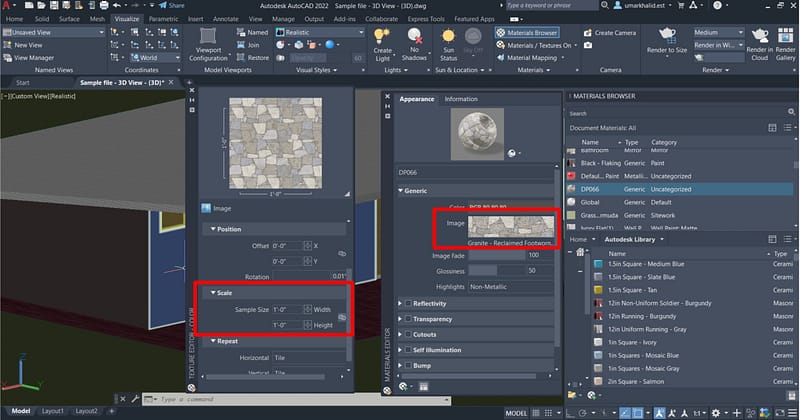
Unlock the proportion by clicking on this “∝” and scale the texture image to the Stone Designer size
The size is 77.5” x 100.7” as specified in the downloaded texture file name.
Enter these size values in the Scale section.
At this point, you are done setting up the material texture.
Next, let’s set up the corresponding bump map.
Scroll down in the appearance section to the Bump tab.
Click the checkbox to the left. You will see its properties editing section open below it.
Select the Bump map file from the location where it was previously saved and click “Open”.
The material bump image is added to the Bump section.
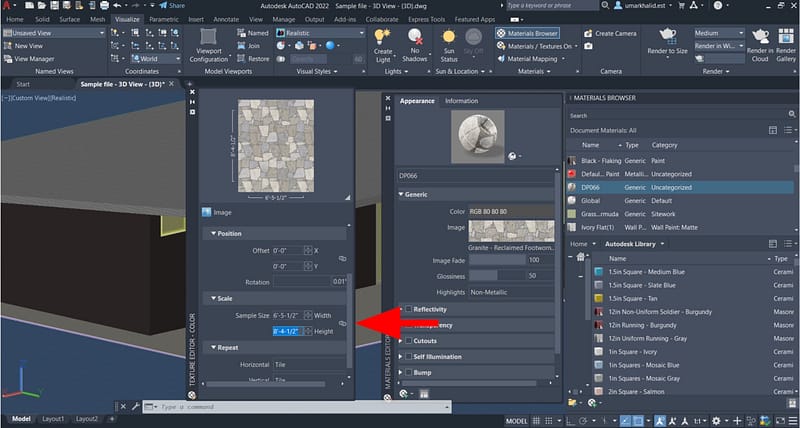
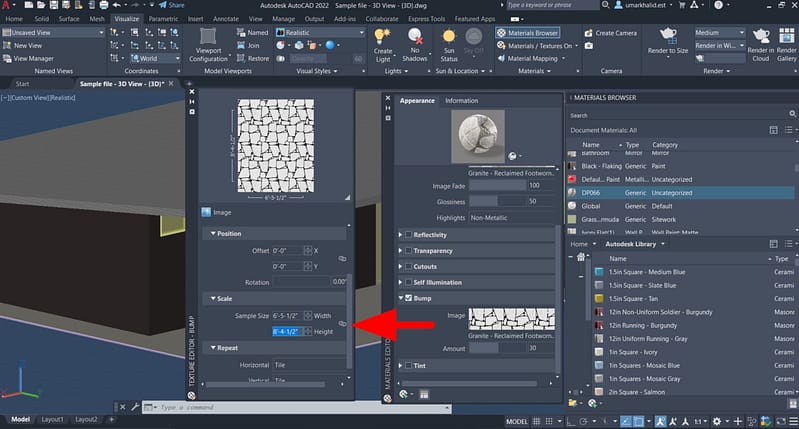
To scale the bump, click on the Image. The Texture Editor will appear
Scroll down to the Scale section. Again, the image is scaled 1’ x 1’ by default.
As you did for the texture, unlock the proportion by clicking on this “∝” and scale the image.
The actual size of 77.5”x100.7” is specified in the name of the downloaded bump file.
Enter these same values for Scale and close the tab.
Then close Material Editor.
At this point, you are done setting up the bump map.
The last step is to apply the material texture to a desired surface.
Select the element you want to apply the material texture.
Right click on the newly created material (i.e. DP066) and select “Assign to Selection.”
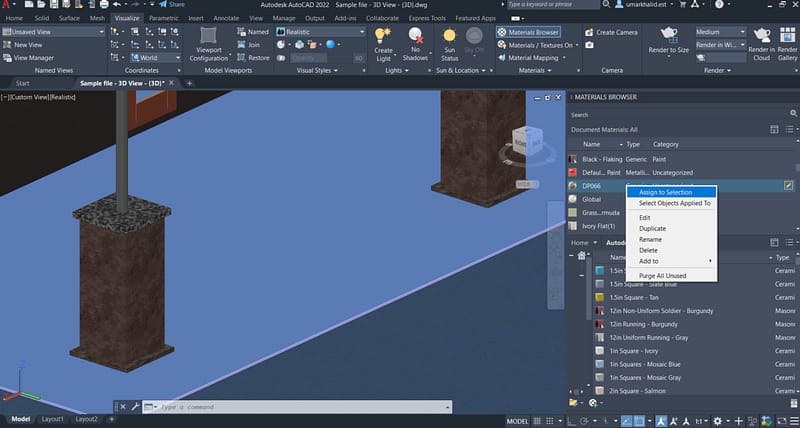
The material texture is applied.

