 Skip to content
 Hatch Patterns for Revit
installation and use
Overview
If you have not downloaded the hatch files yet, go to our hatch page and follow the instructions.
You will quickly notice that these hatches in in the RVT format, not in the commonly used PAT hatch exchange format. PAT files work for patterns made up of straight sides. Most of our stone patterns have rough edges, so we needed to take different approach to sharing them with you. Note that this approach only works for Revit 2020 or newer.
This tutorial is organized into three parts …
Part 1 – How to incorporate a Stone Curators hatch pattern into your Revit design project.
Part 2 – How to apply the hatch to a 2D design view
Part 3 – How to apply the hatch to a 3D design view
Part 1 - How to Incorporate a Stone Curators Hatch Pattern in your Design Project
Step 1 is to save the necessary files to your computer.
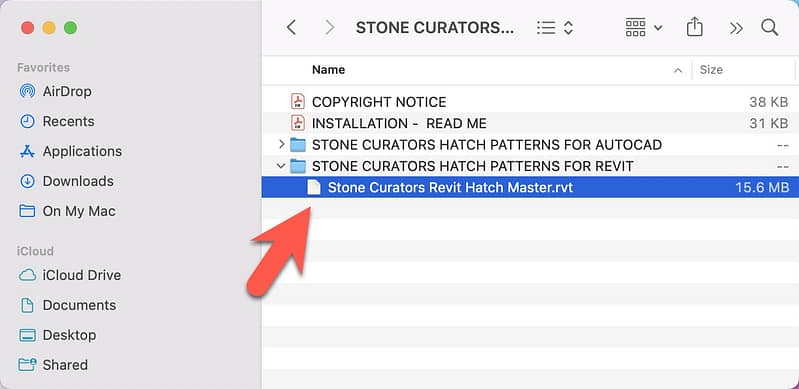
The downloaded zip contains a folder for Revit and a folder for AutoCAD.
Unzip the downloaded file.
Inside you will find a folder for Revit and a folder for AutoCAD.
Open the Revit folder and select the .rvt file.
Save the .rvt file to your computer.
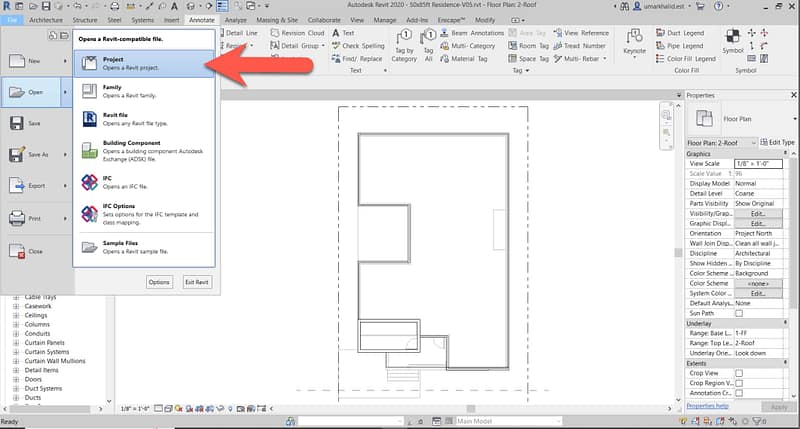
Step 2 is to open the .rvt hatch master in your design project.
Open the Revit project where you wish to use the hatch files.
If you have more than one Revit window open, be sure to open that hatch file in the same window as of your design project.
Go to the File menu.
Select Open.
Select Project.
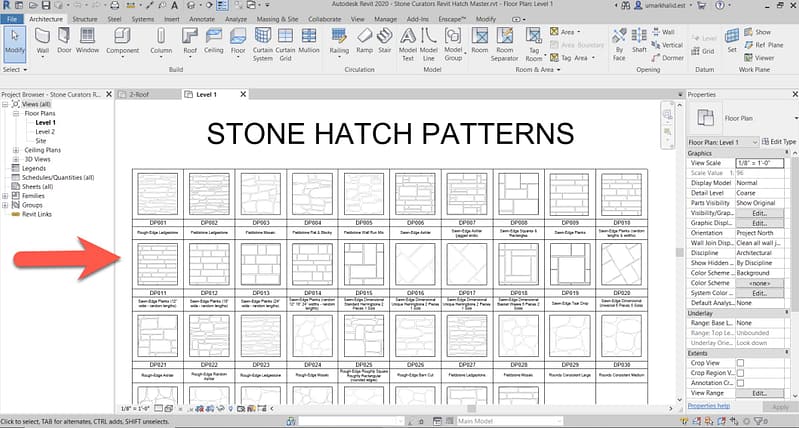
The Revit Hatch Master is displayed in a active view tab.
All of our 100+ hatch patterns are in this single file.
Individual hatch patterns are referenced using the same DP numbers and names used in our Stone Designer and our 3D cad files.
You can go to the resources page on our website for information about these additional resources.
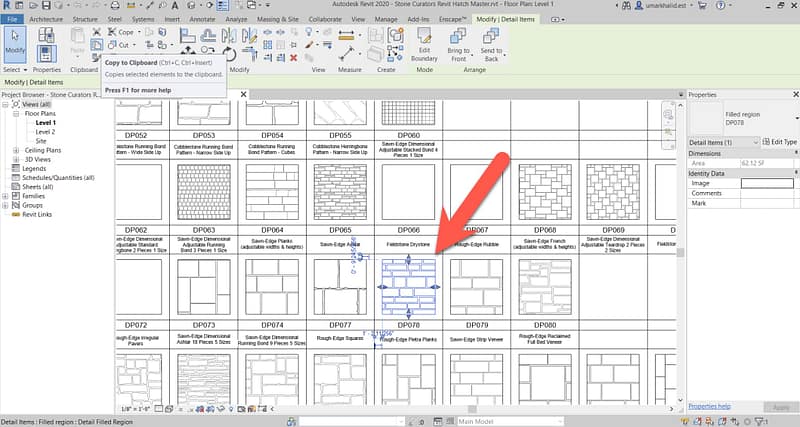
Step 3 is to select a specific hatch that you wish to add to your design project.
For this tutorial we will select DP078 which is a rough edge stone planks pattern.
Click the Copy button in the toolbar.
Select Copy to Clipboard.
Select the desired design view.
Click the Paste button in the toolbar.
Select Paste from Clipboard.
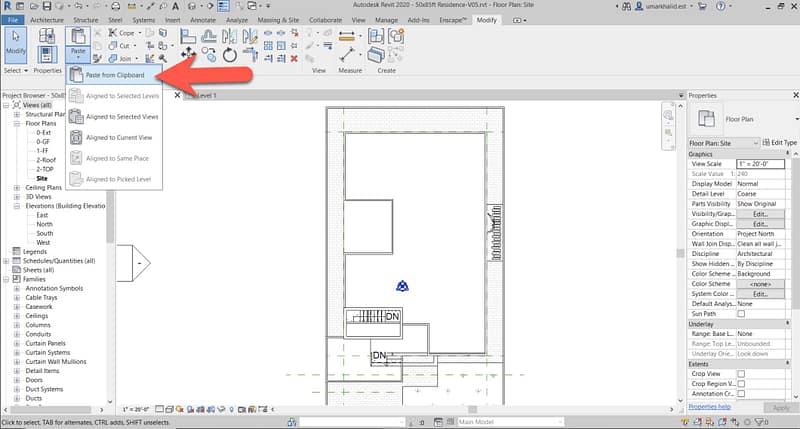
Click it inside the drawing and the hatch will appear.
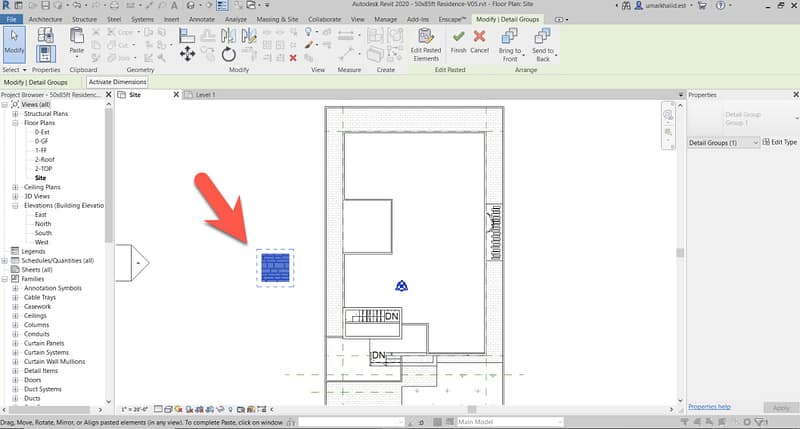
At this point the selected hatch is incorporated in the project, and ready to be used to fill 2D areas or 3D shapes.
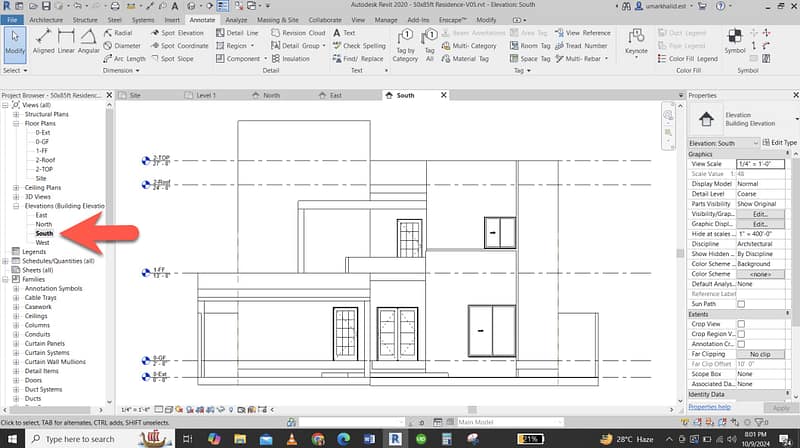
Part 2 - How to Apply the Hatch to a 2D Design View
Select a 2D view from the project browser.
We’ll select the elevation, but the process is the same for any 2D view.
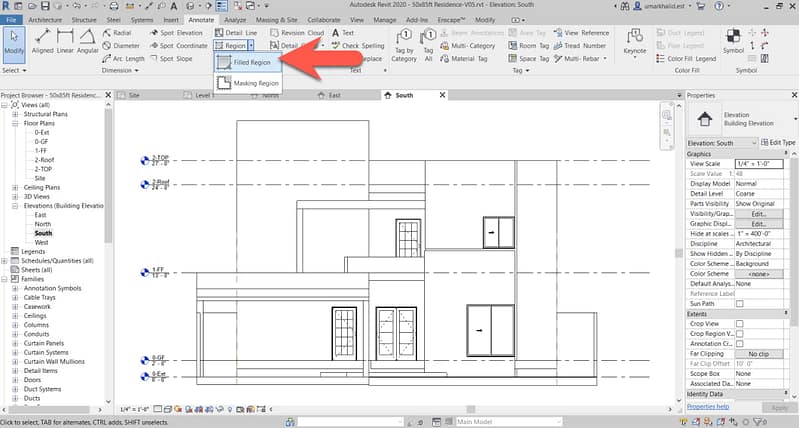
From the Annotate tab.
Click the Region button.
Select Filled Region.
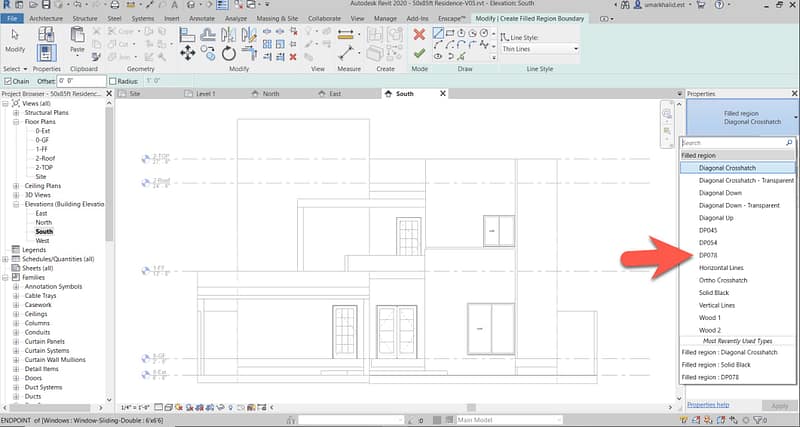
Go to the properties panel on the right.
Click the area where filled region is written at the top of the properties panel.
Select the DP078 hatch from the drop-down.
Using any of the tools from drawing tools’ palette to draw the region that you wish to fill.
Click the green finish edit button after drawing the desired shape.
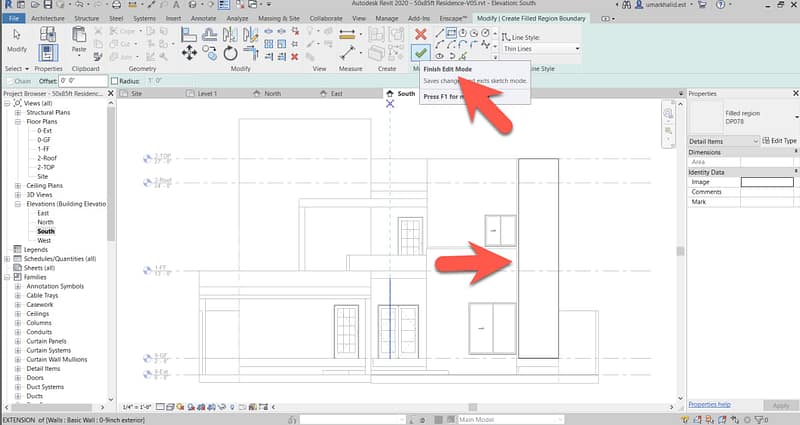
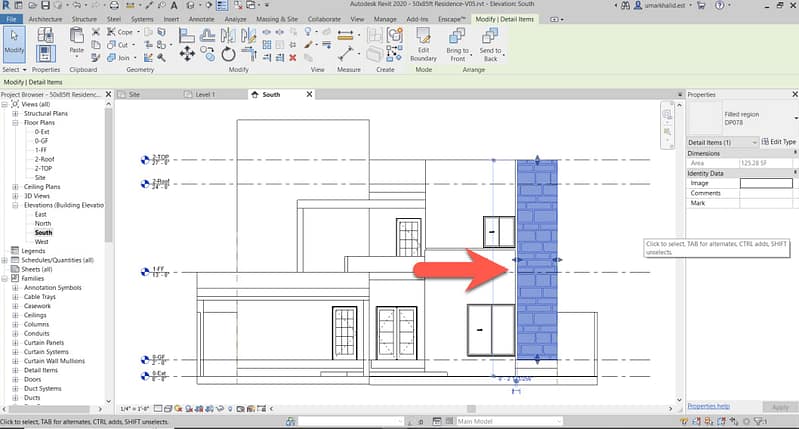
The region will be filled with the selected hatch.
Part 3 - How to Apply the Hatch to a 3D Design View
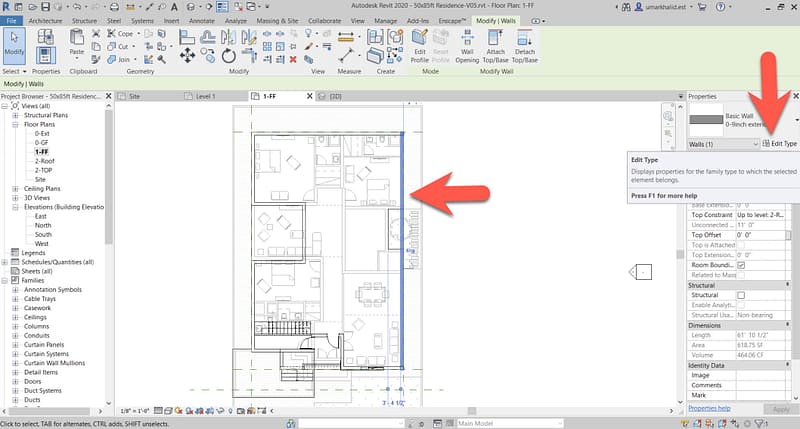
The example is a vertical surface, but it’s the same process for horizontal surfaces.
First, select the wall to which you wish to apply the hatch by clicking on it.
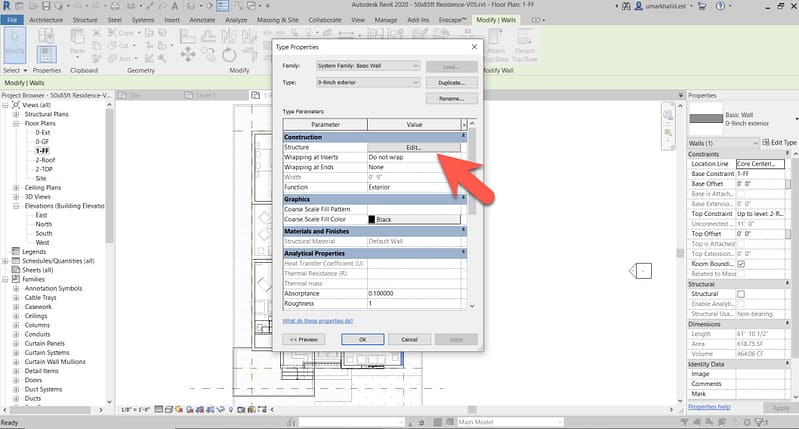
In the properties panel on the left Click the Edit Type button.
The Type Properties popup will appear.
Click on edit button under construction properties of the popup menu.
The Edit Assembly popup will appear.
Click on the Material column corresponding the layer on which you wish to apply the hatch pattern (the wall in this example).
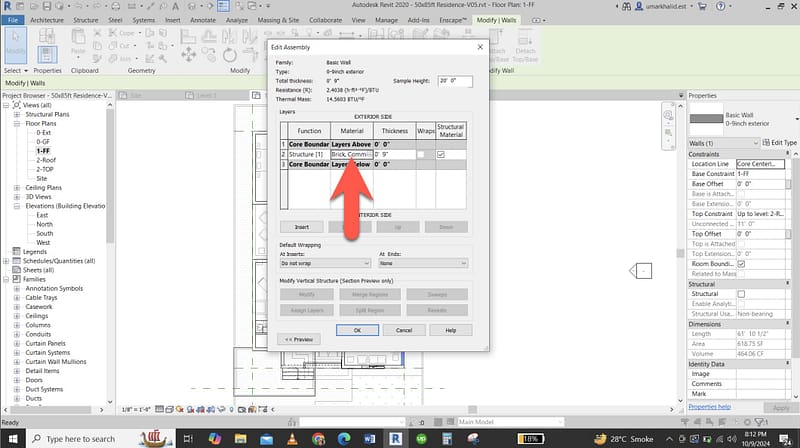
The Material Browser popup will appear.
Click the Create New Material button at the bottom.
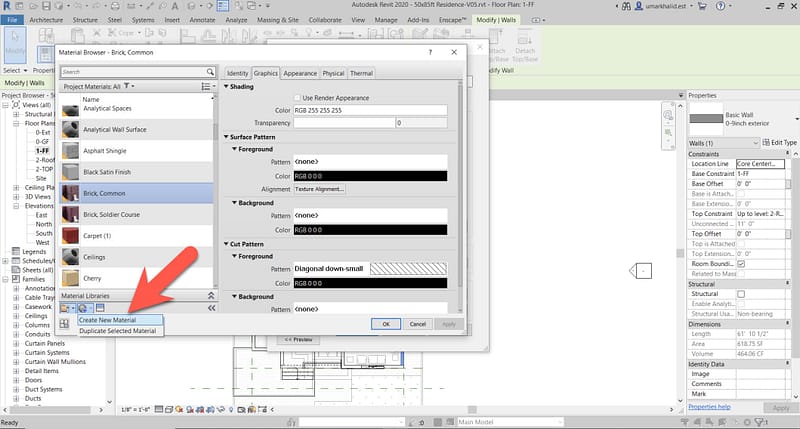
A new material will be created named “Default New Material”.
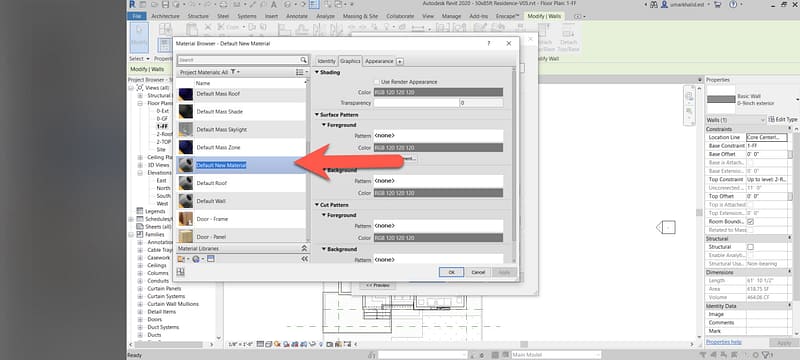
For clarity, edit this name to “DP078”.
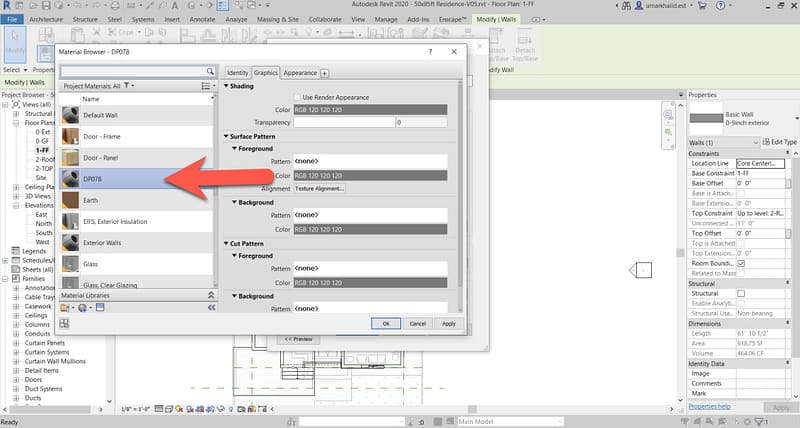
Staying in the Material Browser popup.
Click the Graphics tab.
Click in the Foreground Pattern area in the Surface Pattern properties.
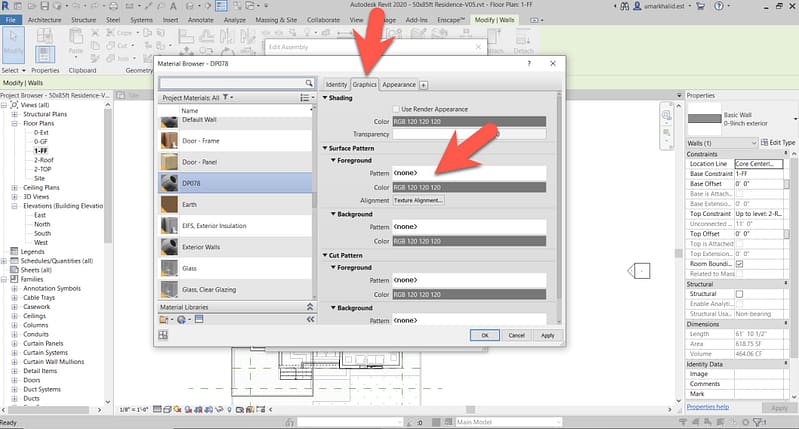
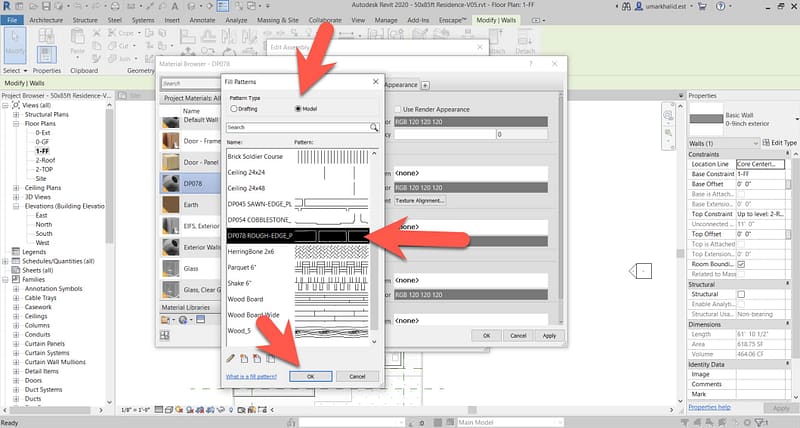
The Fill Patterns selection popup will appear.
Select Model at the top.
Scroll the list until you find the DP078 hatch and select it.
Click OK.
At this point you can close all the popups.
The drawing will be displayed again.
Open the 3D view.
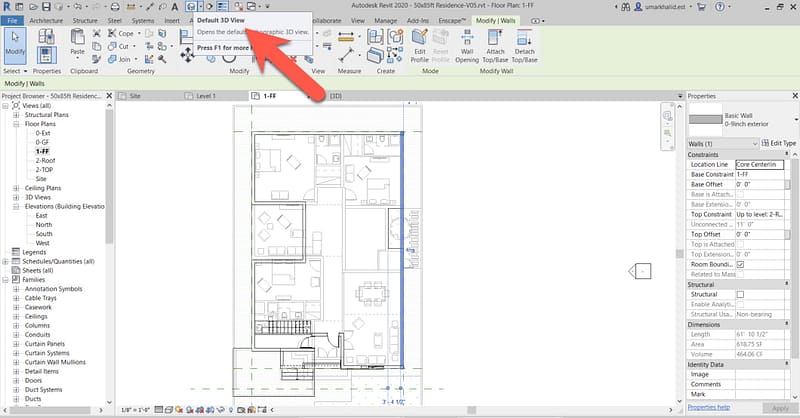
The Hatch pattern has been applied to the wall.
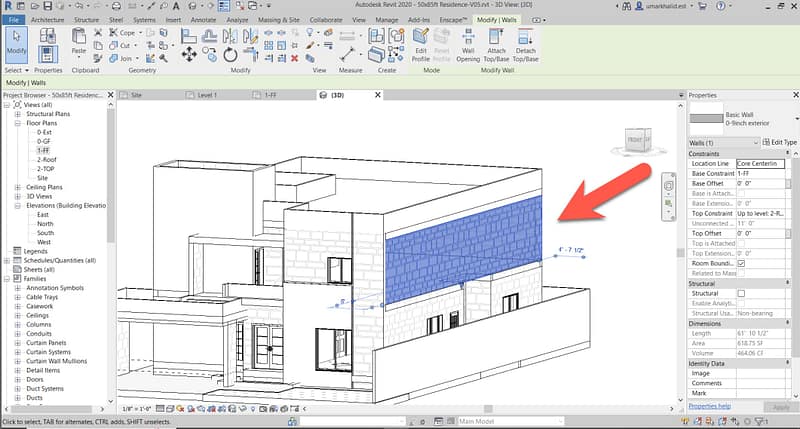
The process for applying a natural stone hatch to a horizontal surfaces like floors, patios and driveways is exactly the same.
Give our natural stone hatch patterns a try and let us know what you think.
